


Here's another guide I wrote elsewhere and thought it'd be worthwhile sharing here ") hope it helps!
hope it helps!
O-powers, like pass powers in the previous games, are special activatable effects that give you various boosts. They can make pokemon easier to catch, give stat increases in battle, increase your EXP and money gain, or even increase the rate at which eggs hatch.
You can find O-Powers on the second screen of the menu in your PSS.

O-powers can either be used on yourself or on a friend/acquaintance/passerby via the PSS, however you can't send Encounter or Stealth Powers to people. If another player uses one on themselves while connected online or within wireless distance, the player can tap their glowing icon to use it as well.
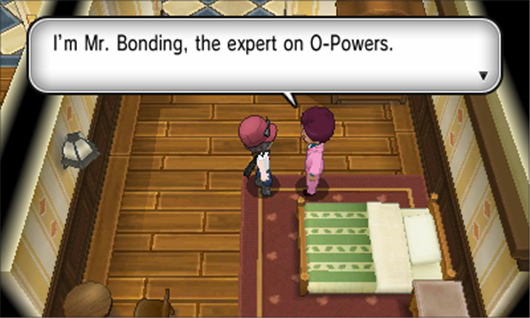
You can find more o-powers throughout your journey in Kalos by talking to Mr.Bonding who appears in a variety of places, usually in pokemon centers and hotels. For a full list of where to find him, see the “List of O-Powers” section below.
Charging O-Power Energy

O-Powers cost varying amounts of Energy to use depending on the type and level of the o-power and whether you are using it on yourself or someone else. Energy gradually recharges over time. You can view how many Energy points you have to use at the bottom of the o-power screen in the PSS. Each green circle represents one energy point. You recover Energy quicker depending on how many steps you have walked with the 3DS that day:
Levels
You can level up your o-powers to get better effects by using them a lot. Higher levels tend to be more expensive than lower levels of o-powers, and also more expensive to use on yourself than on other people.
15 uses of a Level 1 o-power will unlock Level 2, and 30 uses of Level 2 of the o-power will unlock Level 3.
List of O-Powers
Attack Power
Effect: Raises your Pokémon’s attack stat during battle.
Duration: 3 minutes
Levels: lv.1 = 1 stage, lv.2 = 2 stages, lv.3 = 3 stages
Cost to use on self: lv.1 = 3 energy, lv.2 = 4 energy, lv.3 = 5 energy
Cost to use on others: lv.1 = 1 energy, lv.2 = 2 energy, lv.3 = 3 energy
Location of Mr.Bonding: Route 5
Defense Power
Effect: Raises your Pokémon’s defense stat during battle.
Duration: 3 minutes
Levels: lv.1 = 1 stage, lv.2 = 2 stages, lv.3 = 3 stages
Cost to use on self: lv.1 = 3 energy, lv.2 = 4 energy, lv.3 = 5 energy
Cost to use on others: lv.1 = 1 energy, lv.2 = 2 energy, lv.3 = 3 energy
Location of Mr.Bonding: Route 5
Sp. Attack Power
Effect: Raises your Pokémon’s sp. attack stat during battle.
Duration: 3 minutes
Levels: lv.1 = 1 stage, lv.2 = 2 stages, lv.3 = 3 stages
Cost to use on self: lv.1 = 3 energy, lv.2 = 4 energy, lv.3 = 5 energy
Cost to use on others: lv.1 = 1 energy, lv.2 = 2 energy, lv.3 = 3 energy
Location of Mr.Bonding: Camphier Hotel
SP. Defense Power
Effect: Raises your Pokémon’s sp. defense stat during battle.
Duration: 3 minutes
Levels: lv.1 = 1 stage, lv.2 = 2 stages, lv.3 = 3 stages
Cost to use on self: lv.1 = 3 energy, lv.2 = 4 energy, lv.3 = 5 energy
Cost to use on others: lv.1 = 1 energy, lv.2 = 2 energy, lv.3 = 3 energy
Location of Mr.Bonding: Ambrette Hotel
Accuracy Power
Effect: Raises your Pokémon’s accuracy stat during battle.
Duration: 3 minutes
Levels: lv.1 = 1 stage, lv.2 = 2 stages, lv.3 = 3 stages
Cost to use on self: lv.1 = 3 energy, lv.2 = 4 energy, lv.3 = 5 energy
Cost to use on others: lv.1 = 1 energy, lv.2 = 2 energy, lv.3 = 3 energy
Location of Mr.Bonding: Dendemille Town Pokemon Center
Speed Power
Effect: Raises your Pokémon’s speed stat during battle.
Duration: 3 minutes
Levels: lv.1 = 1 stage, lv.2 = 2 stages, lv.3 = 3 stages
Cost to use on self: lv.1 = 3 energy, lv.2 = 4 energy, lv.3 = 5 energy
Cost to use on others: lv.1 = 1 energy, lv.2 = 2 energy, lv.3 = 3 energy
Location of Mr.Bonding: Geosenge Hotel
HP Restoring Power
Effect: Raises your Pokémon’s HP stat during battle.
Duration: 3 minutes
Levels: lv.1 = 20HP, lv.2 = 50HP, lv.3 = 200HP
Cost to use on self: lv.1 = 2 energy, lv.2 = 3 energy, lv.3 = 4 energy
Cost to use on others: lv.1 = 1 energy, lv.2 =2 energy, lv.3 = 3 energy
Location of Mr.Bonding: Route 5
Capture Power
Effect: Increases the capture rate of pokemon
Duration: 3 minutes
Levels: lv.1 = 1.1 stages, lv.2 = 1.2 stages, lv.3 = 1.3 stages
Cost to use on self: lv.1 = 4 energy, lv.2 = 5 energy, lv.3 = 6 energy
Cost to use on others: lv.1 = 2 energy, lv.2 = 3 energy, lv.3 = 4 energy
Location of Mr.Bonding: Route 5
Exp. Point Power
Effect: Increases the amount of EXP gained in battle. Stacks with lucky egg/Exp share.
Duration: 3 minutes
Levels: lv.1 = 20%, lv.2 = 50%, lv.3 = 100%
Cost to use on self: lv.1 = 4 energy, lv.2 = 5 energy, lv.3 = 6 energy
Cost to use on others: lv.1 = 2 energy, lv.2 = 3 energy, lv.3 = 4 energy
Location of Mr.Bonding: Anistar City Pokemon Center
Prize Money Power
Effect: Increases the money gained from a trainer battle. Stacks with amulet coin/gold incense.
Duration: 3 minutes
Levels: lv.1 = 1.5x, lv.2 = 2x, lv.3 = 3x
Cost to use on self: lv.1 = 4 energy, lv.2 = 5 energy, lv.3 = 6 energy
Cost to use on others: lv.1 = 2 energy, lv.2 = 3 energy, lv.3 = 4 energy
Location of Mr.Bonding: Cyllage City Hotel
Befriending Power
Effect: Raises your Pokémon’s happiness.
Duration: 3 minutes
Levels: lv.1 = 1x, lv2. = 2x, lv.3 = 3x
Cost to use on self: lv.1 = 2 energy, lv.2 = 3 energy, lv.3 = 4 energy
Cost to use on others: lv.1 = 1 energy, lv.2 = 2 energy, lv.3 = 3 energy
Location of Mr.Bonding: Courmarine City Pokemon Center
Encounter Power
Effect: Increases the rate of wild pokemon encounters.
Duration: 3 minutes
Levels: lv.1 = 1.5x, lv.2 = 2x, lv.3 = 3x
Cost to use on self: lv.1 = 2 energy, lv.2 = 3 energy, lv.3 = 4 energy
Location of Mr.Bonding: Laverre City Pokemon Center
Stealth Power
Effect: Decreases the rate of wild pokemon encounters.
Duration: 3 minutes
Levels: lv.1 = 0.66666x, lv.2 = 0.5x, lv.3 = 0.33333x
Cost to use on self: lv.1 = 2 energy, lv.2 = 3 energy, lv.3 = 4 energy
Location of Mr.Bonding: Couriway Town Hotel
PP Restoring Power
Effect: Raises your pokemon’s PP in battle.
Duration: 3 minutes
Levels: lv.1 = +5PP, lv.2 = +10PP, lv.3 = +40PP
Cost to use on self: lv.1 = 2 energy, lv.2 = 3 energy, lv.3 = 4 energy
Cost to use on others: lv.1 = 1 energy, lv.2 = 2 energy, lv.3 = 3 energy
Location of Mr.Bonding: Snowbelle City
Bargain Power
Effect: Reduces the prices of items in stores/marts.
Duration: 3 minutes
Levels: lv.1 = 0.9x original price, lv.2 = 0.75x original price, lv.3 = 0.5x original price
Cost to use on self: lv.1 = 2 energy, lv.2 = 3 energy, lv.3 = 4 energy
Cost to use on others: lv.1 = 1 energy, lv.2 = 2 energy, lv.3 = 3 energy
Location of Mr.Bonding: Hotel Richissime in Lumiose City
Critical Power
Effect: Increases the chance of critical hits in battle
Duration: 3 minutes
Levels: lv.1 = +1, lv.2 = +2, lv.3 = +3
Cost to use on self: lv.1 = 2 energy, lv.2 = 3 energy, lv.3 = 4 energy
Cost to use on others: lv.1 = 1 energy, lv.2 = 2 energy, lv.3 = 3 energy
Location of Mr.Bonding: Shalour City Pokemon Center
Hatching Power
Effect: Increases the rate at which eggs hatch.
Duration: 3 minutes
Levels: lv.1 = 1.25x, lv.2 = 1.5x, lv.3 = 2x
Cost to use on self: lv.1 = 2 energy, lv.2 = 3 energy, lv.3 = 4 energy
Cost to use on others: lv.1 = 1 energy, lv.2 = 2 energy, lv.3 = 3 energy
Location of Mr.Bonding: Cafe Introversion in Lumiose City after meeting criteria (see below)
Hatching O-Power
Hatching o-power is the most difficult out of all the o-powers to get, and also the most desirable. You can only get this o-power after completing the game. Mr. Bonding will not appear in Cafe Introversion until you meet all of the criteria below.
You can check how much style you have by going into the Stone Emporium and buying a mega stone - if the mega stone costs 50,000 Pokedollars or less then congratulations! You have enough style for Mr. Bonding to appear. If it costs more than 50,000 Pokedollars then you will need to keep buying up premier balls.
hope it helps!O-Power Guide
O-powers, like pass powers in the previous games, are special activatable effects that give you various boosts. They can make pokemon easier to catch, give stat increases in battle, increase your EXP and money gain, or even increase the rate at which eggs hatch.
You can find O-Powers on the second screen of the menu in your PSS.
O-powers can either be used on yourself or on a friend/acquaintance/passerby via the PSS, however you can't send Encounter or Stealth Powers to people. If another player uses one on themselves while connected online or within wireless distance, the player can tap their glowing icon to use it as well.
You can find more o-powers throughout your journey in Kalos by talking to Mr.Bonding who appears in a variety of places, usually in pokemon centers and hotels. For a full list of where to find him, see the “List of O-Powers” section below.
Charging O-Power Energy
O-Powers cost varying amounts of Energy to use depending on the type and level of the o-power and whether you are using it on yourself or someone else. Energy gradually recharges over time. You can view how many Energy points you have to use at the bottom of the o-power screen in the PSS. Each green circle represents one energy point. You recover Energy quicker depending on how many steps you have walked with the 3DS that day:
- 0-1999 steps: x1 recovery speed
- 2000-2999 steps: x2 recovery speed
- 3000-3999 steps: x3 recovery speed
- 4000+ steps: x4 recovery speed
Levels
You can level up your o-powers to get better effects by using them a lot. Higher levels tend to be more expensive than lower levels of o-powers, and also more expensive to use on yourself than on other people.
15 uses of a Level 1 o-power will unlock Level 2, and 30 uses of Level 2 of the o-power will unlock Level 3.
List of O-Powers
Attack Power
Effect: Raises your Pokémon’s attack stat during battle.
Duration: 3 minutes
Levels: lv.1 = 1 stage, lv.2 = 2 stages, lv.3 = 3 stages
Cost to use on self: lv.1 = 3 energy, lv.2 = 4 energy, lv.3 = 5 energy
Cost to use on others: lv.1 = 1 energy, lv.2 = 2 energy, lv.3 = 3 energy
Location of Mr.Bonding: Route 5
Defense Power
Effect: Raises your Pokémon’s defense stat during battle.
Duration: 3 minutes
Levels: lv.1 = 1 stage, lv.2 = 2 stages, lv.3 = 3 stages
Cost to use on self: lv.1 = 3 energy, lv.2 = 4 energy, lv.3 = 5 energy
Cost to use on others: lv.1 = 1 energy, lv.2 = 2 energy, lv.3 = 3 energy
Location of Mr.Bonding: Route 5
Sp. Attack Power
Effect: Raises your Pokémon’s sp. attack stat during battle.
Duration: 3 minutes
Levels: lv.1 = 1 stage, lv.2 = 2 stages, lv.3 = 3 stages
Cost to use on self: lv.1 = 3 energy, lv.2 = 4 energy, lv.3 = 5 energy
Cost to use on others: lv.1 = 1 energy, lv.2 = 2 energy, lv.3 = 3 energy
Location of Mr.Bonding: Camphier Hotel
SP. Defense Power
Effect: Raises your Pokémon’s sp. defense stat during battle.
Duration: 3 minutes
Levels: lv.1 = 1 stage, lv.2 = 2 stages, lv.3 = 3 stages
Cost to use on self: lv.1 = 3 energy, lv.2 = 4 energy, lv.3 = 5 energy
Cost to use on others: lv.1 = 1 energy, lv.2 = 2 energy, lv.3 = 3 energy
Location of Mr.Bonding: Ambrette Hotel
Accuracy Power
Effect: Raises your Pokémon’s accuracy stat during battle.
Duration: 3 minutes
Levels: lv.1 = 1 stage, lv.2 = 2 stages, lv.3 = 3 stages
Cost to use on self: lv.1 = 3 energy, lv.2 = 4 energy, lv.3 = 5 energy
Cost to use on others: lv.1 = 1 energy, lv.2 = 2 energy, lv.3 = 3 energy
Location of Mr.Bonding: Dendemille Town Pokemon Center
Speed Power
Effect: Raises your Pokémon’s speed stat during battle.
Duration: 3 minutes
Levels: lv.1 = 1 stage, lv.2 = 2 stages, lv.3 = 3 stages
Cost to use on self: lv.1 = 3 energy, lv.2 = 4 energy, lv.3 = 5 energy
Cost to use on others: lv.1 = 1 energy, lv.2 = 2 energy, lv.3 = 3 energy
Location of Mr.Bonding: Geosenge Hotel
HP Restoring Power
Effect: Raises your Pokémon’s HP stat during battle.
Duration: 3 minutes
Levels: lv.1 = 20HP, lv.2 = 50HP, lv.3 = 200HP
Cost to use on self: lv.1 = 2 energy, lv.2 = 3 energy, lv.3 = 4 energy
Cost to use on others: lv.1 = 1 energy, lv.2 =2 energy, lv.3 = 3 energy
Location of Mr.Bonding: Route 5
Capture Power
Effect: Increases the capture rate of pokemon
Duration: 3 minutes
Levels: lv.1 = 1.1 stages, lv.2 = 1.2 stages, lv.3 = 1.3 stages
Cost to use on self: lv.1 = 4 energy, lv.2 = 5 energy, lv.3 = 6 energy
Cost to use on others: lv.1 = 2 energy, lv.2 = 3 energy, lv.3 = 4 energy
Location of Mr.Bonding: Route 5
Exp. Point Power
Effect: Increases the amount of EXP gained in battle. Stacks with lucky egg/Exp share.
Duration: 3 minutes
Levels: lv.1 = 20%, lv.2 = 50%, lv.3 = 100%
Cost to use on self: lv.1 = 4 energy, lv.2 = 5 energy, lv.3 = 6 energy
Cost to use on others: lv.1 = 2 energy, lv.2 = 3 energy, lv.3 = 4 energy
Location of Mr.Bonding: Anistar City Pokemon Center
Prize Money Power
Effect: Increases the money gained from a trainer battle. Stacks with amulet coin/gold incense.
Duration: 3 minutes
Levels: lv.1 = 1.5x, lv.2 = 2x, lv.3 = 3x
Cost to use on self: lv.1 = 4 energy, lv.2 = 5 energy, lv.3 = 6 energy
Cost to use on others: lv.1 = 2 energy, lv.2 = 3 energy, lv.3 = 4 energy
Location of Mr.Bonding: Cyllage City Hotel
Befriending Power
Effect: Raises your Pokémon’s happiness.
Duration: 3 minutes
Levels: lv.1 = 1x, lv2. = 2x, lv.3 = 3x
Cost to use on self: lv.1 = 2 energy, lv.2 = 3 energy, lv.3 = 4 energy
Cost to use on others: lv.1 = 1 energy, lv.2 = 2 energy, lv.3 = 3 energy
Location of Mr.Bonding: Courmarine City Pokemon Center
Encounter Power
Effect: Increases the rate of wild pokemon encounters.
Duration: 3 minutes
Levels: lv.1 = 1.5x, lv.2 = 2x, lv.3 = 3x
Cost to use on self: lv.1 = 2 energy, lv.2 = 3 energy, lv.3 = 4 energy
Location of Mr.Bonding: Laverre City Pokemon Center
Stealth Power
Effect: Decreases the rate of wild pokemon encounters.
Duration: 3 minutes
Levels: lv.1 = 0.66666x, lv.2 = 0.5x, lv.3 = 0.33333x
Cost to use on self: lv.1 = 2 energy, lv.2 = 3 energy, lv.3 = 4 energy
Location of Mr.Bonding: Couriway Town Hotel
PP Restoring Power
Effect: Raises your pokemon’s PP in battle.
Duration: 3 minutes
Levels: lv.1 = +5PP, lv.2 = +10PP, lv.3 = +40PP
Cost to use on self: lv.1 = 2 energy, lv.2 = 3 energy, lv.3 = 4 energy
Cost to use on others: lv.1 = 1 energy, lv.2 = 2 energy, lv.3 = 3 energy
Location of Mr.Bonding: Snowbelle City
Bargain Power
Effect: Reduces the prices of items in stores/marts.
Duration: 3 minutes
Levels: lv.1 = 0.9x original price, lv.2 = 0.75x original price, lv.3 = 0.5x original price
Cost to use on self: lv.1 = 2 energy, lv.2 = 3 energy, lv.3 = 4 energy
Cost to use on others: lv.1 = 1 energy, lv.2 = 2 energy, lv.3 = 3 energy
Location of Mr.Bonding: Hotel Richissime in Lumiose City
Critical Power
Effect: Increases the chance of critical hits in battle
Duration: 3 minutes
Levels: lv.1 = +1, lv.2 = +2, lv.3 = +3
Cost to use on self: lv.1 = 2 energy, lv.2 = 3 energy, lv.3 = 4 energy
Cost to use on others: lv.1 = 1 energy, lv.2 = 2 energy, lv.3 = 3 energy
Location of Mr.Bonding: Shalour City Pokemon Center
Hatching Power
Effect: Increases the rate at which eggs hatch.
Duration: 3 minutes
Levels: lv.1 = 1.25x, lv.2 = 1.5x, lv.3 = 2x
Cost to use on self: lv.1 = 2 energy, lv.2 = 3 energy, lv.3 = 4 energy
Cost to use on others: lv.1 = 1 energy, lv.2 = 2 energy, lv.3 = 3 energy
Location of Mr.Bonding: Cafe Introversion in Lumiose City after meeting criteria (see below)
Hatching O-Power
Hatching o-power is the most difficult out of all the o-powers to get, and also the most desirable. You can only get this o-power after completing the game. Mr. Bonding will not appear in Cafe Introversion until you meet all of the criteria below.
- You need every o-power except hatching power
- You need max style in Lumiose City
- Make a PR Video and the PR Video Studio in Southern Boulevard.
- Visit the Lumiose Museum and listen to the Audio Guide.
- Try out the Loto-ID Center.
- Style your Furfrou at Friseur Furfrou in Vernal Avenue.
- Style your hair at Coiffure Clips in South Boulevard.
- Buy Juice and Galettes.
- Take a Gogoat Shuttle, Lumi-Cab, or Train.
- Shop at the Herboriste, Stone Emporium, Poke Ball Boutique, and Boutique Couture.
- Eat at Restaurant Le Nah, Le Yeah and Le Wow (you can only enter Le Wow after defeating the Elite Four)
- Take the Battle Institute Challenge. (you can only take the challenge after defeating the Elite Four)
- Help out at Hotel Richissime.
- Talk with Alexa at Lumiose Press.
- Be able to enter Boutique Couture.
You can check how much style you have by going into the Stone Emporium and buying a mega stone - if the mega stone costs 50,000 Pokedollars or less then congratulations! You have enough style for Mr. Bonding to appear. If it costs more than 50,000 Pokedollars then you will need to keep buying up premier balls.