Bravely Default: Where the Fairy Flies

Saya Kisaragi

The Void Queen
Donor
Credits
0
Bravely-Default-European-Box-Art.jpg

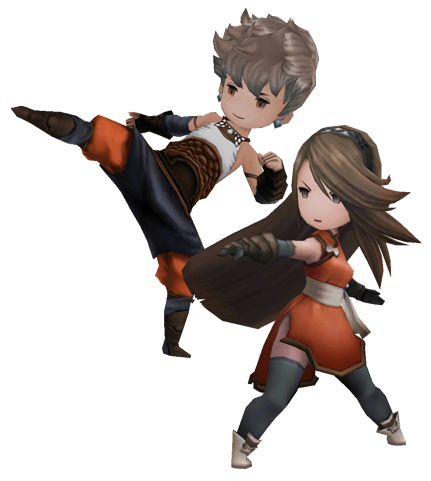
Bravely Default isnt the first game of its series, that was Bravely Default: Praying Brage. but Bravely Default: Where the Fairy Flies, is similar to Square Enix's Final Fantasy series cause of the magic spells (Holy and Quake) and job titles (such as Summoner and Knight). Tiz Arrior is a villager of the sleepy town of Norende. His world of peace and quiet came crumbling down when a chasm opened up and swallowed his village along with his little brother, Til. Tiz wakes up in the Kingdom of Caldisla and is told he is the only survivor of Norende. To see if its true, he heads to Norende to find nothing but the Great Chasm that swallowed Norende. However he is not alone, Tiz meets Agnes Oblige, the Vestal of Wind, and Airy, a crystfairy. Not long after meeting each other, they get attacked by the Etenrian Sky Knights. Tiz and Agnes escape the Sky Knights by luck (the sky knights wasted all of there ammo supply). however Agnes asks Tiz to escort her to the lake as their final goodbye but when they get there the Sky Knights attack again but this time the Monk Barras Lehr and White Mage Holly Whyte are the ones who fight (after the fight you get the White Mage job and the Monk job). the two head back to Caldisla, and again the sky knight attack but by Black Mage Ominas Crowe and Edea Lee (who later on changes side from the Etenrian Forces to the teams). the next morning after the fire, Tiz and Agnes meet Ringabel, boy who has no memory of his past but carries a journal with him that knows everything that goes on in the group. the head to the Centro Ruins to defeat Ominas Crowe, but they stumble upon Ominas and Edea in an arguement. once the group confronts Ominas, Edea asks Tiz, Agnes and Ringabel to help her defeat him, in which they do.

and from there you discover the rest of the story on your own.
 

Saya Kisaragi

The Void Queen
Donor
Credits
0
throughout the game you can do sidequests to unlock different and powerful jobs. the jobs are monk, white mage, black mage, knight, thief, merchant, spell fencer, time mage, ranger, summoner, valkyrie, red mage, performer, salve-maker, pirate, ninja, swordmaster, spiritmaster, arcanist, templar, dark knight, vampire and conjurer. each job has a specific task only they can perform and are unique to them, plus along with their support ability.
 

Saya Kisaragi

The Void Queen
Donor
Credits
0
each job gains a level, max is level 14. you need to earn Job Points (JP) to level up
  • Level 2: 30 JP
  • Level 3: 70 JP
  • Level 4: 150 JP
  • Level 5: 200 JP
  • Level 6: 250 JP
  • Level 7: 400 JP
  • Level 8: 600 JP
  • Level 9: 800 JP
  • Level 10: 3,500 JP
  • Level 11: 4,000 JP
  • Level 12: 4,000 JP
  • Level 13: 5,000 JP
  • Level 14: 5,000 JP/9,999 JP for Freelancer
 

Saya Kisaragi

The Void Queen
Donor
Credits
0
320x-1

Freelancer
The Freelancer is, as the cliché goes, a jack of all trades and a master of none, with distinctly average HP, MP, Strength, Dexterity, Agility, Vitality, Mind and Intelligence stats. They also have a B-rank with all weapons, which means they can equip pretty much anything without penalty -- but without bonuses either.

This unremarkable nature doesn't mean you should disregard Freelancer, though; where the Job really shines is in its special abilities, all of which are very useful. Freelancer's Late Bloomer passive ability also causes all stats to rise by 1% for every other Job you master, making it an extremely powerful late-game option if you've taken the time to level a lot of Jobs.

Freelancer Abilities

  • Job Level 1: Examine (battle ability) -- Displays enemy information, including HP, elemental weakness and enemy type.
  • Job Level 2: Treat (battle ability) -- Restore 20% HP to one ally, can be used while Silenced.
  • Job Level 3: Divining Rod (support ability, cost 1) -- Displays the number of unopened treasure chests in the zone you're currently in on the map screen.
  • Job Level 4: Dungeon Master (support ability, cost 1) -- Avoid damage and status effects from traps in dungeons. Applies to the whole party even when only equipped once.
  • Job Level 5: Mislead (support ability, cost 1) -- Lowers chances of being targeted by enemies. Useful for mages.
  • Job Level 6: Prayer (support ability, cost 1) -- Increase success rate of self-buffs.
  • Job Level 7: MP 10% Up (support ability, cost 1) -- Self-explanatory.
  • Job Level 8: Endure (battle ability) -- Raise physical and magic defense by 25% for four turns.
  • Job Level 9: Poison Immunity (support ability, cost 1) -- Self-explanatory.
  • Job Level 10: JP Up (support ability, cost 1) -- Earn JP at 1.2 times the normal rate.
  • Job Level 11: Flee (battle ability) -- Escape with 100% success rate, except boss fights and other inescapable battles.
  • Job Level 12: Lure Enemy (support ability, cost 1) -- Double encounter rate. Largely useless, given the slider in the menu, unless you really want encounters at 400% the normal rate, which allows you to recreate that one dungeon in Final Fantasy I where going the wrong way would give you a battle every single step.
  • Job Level 13: Stand Ground (support ability, cost 3) -- Have a 75% chance to survive (with 1HP) damage that would normally KO you, except where your HP is already at 1.
  • Job Level 14: Mimic (battle ability) -- Perform the same ability that was just performed, whether it was your own or an ally's. No resources (HP, MP, BP, pg or items) will be consumed in the Mimic process. Have a firm understanding of the order your party members act in before using this!
 

Saya Kisaragi

The Void Queen
Donor
Credits
0
BDFF_Monk.png

Monk
You'll acquire the Monk asterisk early in the game, after the boss fight against Barras Lehr and Holly Whyte.

Monks have high HP and physical strength, but low MP, Dexterity, Mind and Intelligence, making magic-based or accuracy-dependent secondary abilities less than useful. They have S-rank proficiency with their fists or knuckle weapons and staves, but rank E with all other weapons and any armor that requires proficiency to wear. Thus, Monks are best equipped with light armor and either no weapon -- a value equal to twice your level will be added to your physical attack in this case -- or a decent set of knuckles.

Max out Monk and you'll get the support ability Natural Talent, which increases your physical attack rating by a whopping 100% if you have the guts to play with no equipment whatsoever -- a good combo with the Freelancer's Mislead support ability.

Monk Abilities

  • Job Level 1: Strong Strike (battle ability) -- Deal double damage to a single target with a 50% chance of missing.
  • Job Level 2: Invigorate (battle ability) -- Raise physical attack by 25% for two turns. 25% chance that this will fail, dealing damage equal to 20% of your max HP.
  • Job Level 3: Inner Alchemy (battle ability, 5MP) -- Cure Poison, Blind, Silence, Dread and Confuse on self.
  • Job Level 4: HP 10% Up (support ability, cost 1) -- Self-explanatory.
  • Job Level 5: Knuckle Lore (support ability, cost 1) -- Useless for Monk, but allows other classes to enjoy the Monk's S-rank proficiency with knuckle weapons.
  • Job Level 6: Hidden Dragon (battle ability) -- Attack at the end of the turn, but deal 1.25 times your normal damage to a single target.
  • Job Level 7: Qigong Wave (battle ability, 12MP) -- Ignore Default's damage reduction and deal 1.25 times normal damage to one target.
  • Job Level 8: Blind Immunity (support ability, cost 1) -- Self-explanatory.
  • Job Level 9: P.Attack 10% Up (support ability, cost 1) -- Increase Physical Attack by 10%.
  • Job Level 10: HP 20% Up (support ability, cost 2) -- Self-explanatory.
  • Job Level 11: Pressure Point (battle ability, 1BP) -- Ignore target's defense and deal double normal damage.
  • Job Level 12: HP 30% Up (support ability, cost 1) -- Self-explanatory.
  • Job Level 13: Phoenix Flight (battle ability) -- Reduce HP to 1, convert damage taken into damage applied to one enemy. Best combined with HP Up support abilities.
  • Job Level 14: Natural Talent (support ability, cost 1) -- Raise Physical Attack by 100% when nothing is equipped in right hand, left hand, head, body and accessory slots.
 

Saya Kisaragi

The Void Queen
Donor
Credits
0
job_white-mage_chara.png

White Mage
You'll obtain White Mage at the same time as you acquire the Monk asterisk.

White Mages have moderate HP, high MP and high Mind. Their Intelligence isn't bad, either, meaning they can wield offensive spells quite effectively, but that high Mind stat means they make the most effective healers.

White Mages have the passive ability to self-heal, which means they'll automatically recover from Poison, Blind and Silence at the end of a battle, though this unfortunately doesn't make them immune to these effects during battle.

You'll want to equip White Mages with light armor and a staff, though they can also wield daggers and shields reasonably well. Staffs usually have lower physical attack, but counterbalance this with a boost to magical capabilities.

White Mage Abilities

  • Job Level 1: White Magic Lv.1 (job command) -- Use level 1 White Magic spells (Cure, Poisona, Blindna) which you have purchased the scrolls for.
  • Job Level 2: M.Defense 10% Up (support ability, cost 1) -- Raise Magic Defense by 10%.
  • Job Level 3: White Magic Lv.2 (job command) -- Use level 2 White Magic spells (Protect, Shell, Aero) which you have purchased the scrolls for.
  • Job Level 4:Staff Lore (support ability, cost 1) -- Raise staff proficiency to S. Useful for Jobs who are poor at wielding staves but for whom you wish to be able to boost the magical abilities of.
  • Job Level 5:Self-Healing (support ability, cost 1) -- Same as the White Mage's passive ability.
  • Job Level 6:White Magic Lv.3 (job command) -- Use level 3 White Magic spells (Cura, Raise, Esuna) which you have purchased the scrolls for.
  • Job Level 7:Abate Water (support ability, cost 1) -- Reduce damage from water attacks.
  • Job Level 8: Angelic Ward (support ability, cost 1) -- 50% chance to halve incoming damage, whether it's a single- or multiple-target attack.
  • Job Level 9 White Magic Lv.4 (job command) -- Use level 4 White Magic spells (Reflect, Dispel, Aerora) which you have purchased the scrolls for.
  • Job Level 10: M.Defense 30% Up (support ability, cost 3) -- Raise Magic Defense by 30%.
  • Job Level 11: White Magic Lv.5 (job command) -- Use level 5 White Magic spells (Esunaga, Curada, Aeroga) which you have purchased the scrolls for.
  • Job Level 12: Epic Group-Cast (support ability, cost 3) -- Magic does not lose potency when casting on multiple targets.
  • Job Level 13: White Magic Lv.6 (job command) -- Use level 6 White Magic spells (Curaga, Arise, Holy) which you have purchased the scrolls for.
  • Job Level 14: Conservation of Life (support ability, cost 3) -- Restore all allies -- including those already KO'ed -- to full HP when you suffer a KO. Only works once per battle.
 

Saya Kisaragi

The Void Queen
Donor
Credits
0
Black Mage
You'll likewise obtain Black Mage as part of the main story, this time when you defeat the boss Ominas Crowe early in the game. You'll also fill out your party roster with Edea around the same time.

Black Mages are useful in the early game, particularly for exploiting elemental weaknesses, but later in the game you'll probably find melee attackers are more effective at dealing quick damage. There are some useful support abilities worth learning, though -- particularly the ability to pierce magic defense -- and they're obviously great at fighting opponents that are immune to physical attacks, such as some of the Nemesis bosses.

The Black Mage's Black Resonance passive ability becomes more useful if several characters have learned the Job up to level 8 so you can stack bonuses from several characters. It does take up a valuable support ability slot, though, so think carefully before devoting too much time to training an army of magic-users.

Black Mage Abilities

  • Job Level 1: Black Magic Lv.1 (job command) -- Use level 1 Black Magic spells (Fire, Blizzard, Thunder) you've purchased the scrolls for. Note that Blizzard is considered "water" damage rather than "ice."
  • Job Level 2: Rod Lore (support ability, cost 1) -- A support ability that allows other classes to use rods as well as a Black Mage can. Primarily useful for other casters.
  • Job Level 3: Black Magic Lv. 2 (job command) -- Use level 2 Black Magic spells (Silence, Poison, Sleep) you've purchased the scrolls for.
  • Job Level 4: Abate Fire (support ability, cost 1) -- Reduce damage from fire-based attacks.
  • Job Level 5: Damage Dispersion (support ability, cost 1) -- Split any damage to you between you and your allies -- 15% each on your current allies, and the remainder on yourself.
  • Job Level 6: Silence Immunity (support ability, cost 1) -- Essential.
  • Job Level 7: Black Magic Lv.3 (job command) -- Use level 3 Black Magic spells (Fira, Blizzara, Thundara) you've purchased the scrolls for.
  • Job Level 8: Black Resonance (support ability, cost 1) -- Black Magic damage rises with each additional ally other than yourself with this ability set.
  • Job Level 9: Black Magic Lv.4 (job command) -- Use level 4 Black Magic spells (Drain, Aspir, Fear) you've purchased the scrolls for.
  • Job Level 10: M.Attack 20% Up (support ability, cost 2) -- Increase Magic Attack by 20%.
  • Job Level 11: Black Magic Lv.5 (job command) -- Use level 5 Black Magic spells (Firaga, Blizzaga, Thundaga) you've purchased the scrolls for.
  • Job Level 12: Pierce Magic Defense (support ability, cost 3) -- Ignore target's Magic Defense when dealing magical damage.
  • Job Level 13: Black Magic Lv.6 (job command) -- Use level 6 Black Magic spells (Dark, Kill, Death) you've purchased the scrolls for.
  • Job Level 14: Group-Cast All (support ability, cost 3) -- Group-cast spells that are normally limited to a single target, with the exception of spells that only target yourself.
 

Saya Kisaragi

The Void Queen
Donor
Credits
0
Knight
Also acquired through the main story, after the boss fight against Heinkel.

Knights are a good early-game tank class, but become less useful as the game goes on. They have unmatched Vitality, which means they soak up a huge amount of damage, but their other abilities aren't anything to get too excited about. Their Strength is reasonable, allowing them to deal decent physical damage, and their Mind stat is similarly not-bad, meaning they can be a backup healer in a pinch.

Where Knights become particularly useful is through their Protect Ally passive skill, which automatically covers any ally with less than 20% HP left who takes a single-target attack. At Job Level 10, you'll also learn Full Cover, which allows you to designate a specific ally to cover for the whole turn -- when you do, you'll only take half the damage your ally would have suffered.

Knight Abilities

  • Job Level 1: Stomp (battle ability) -- Deal damage 1.25 times stronger than usual, but suffer a 25% penalty to physical and magical defense for two turns.
  • Job Level 2: Two-handed (support ability, cost 1) -- Allows swords, axes, spears, staves and katana to be held in both hands for double the physical attack stat at the expense of equipping a shield.
  • Job Level 3: P.Defense 10% Up (support ability, cost 1) -- Increase Physical Defense by 10%.
  • Job Level 4: Ironclad (battle ability, 5MP) -- Increase physical defense for a whole turn.
  • Job Level 5: Protect Ally (support ability, cost 1) -- Same as Knight's passive ability.
  • Job Level 6: Shield Strike (battle ability, 8MP) -- Deal normal damage and raise physical defense by 25% for two turns. Only available if a shield is equipped.
  • Job Level 7: Shield Lore (support ability, cost 1) -- Raises shield proficiency to S-rank.
  • Job Level 8: Vengeance (battle ability, 1BP) -- Attack all enemies, with power increasing according to how many allies are in the KO state.
  • Job Level 9: Sword Lore (support ability, cost 1) -- Raise sword proficiency to S.
  • Job Level 10: Full Cover (battle ability) -- During the entire turn this is used, you'll cover a single ally, taking any single-target hits meant for them and only suffering half the damage.
  • Job Level 11: Dual Shield (support ability, cost 1) -- Equip a shield on both arms. Makes for unstoppable defense, but not much in the way of attack power.
  • Job Level 12: P.Defense 30% Up (support ability, cost 3) -- Increase Physical Defense by 30%.
  • Job Level 13:Chivalrous Spirit (support ability, cost 1) -- Raise Physical Defense by 25% for five turns if Protect Ally, Full Cover or Merchant ability White Knight is used.
  • Job Level 14: Super Charge (battle ability, 1BP) -- Convert double your physical defense into attack power, then attack a single enemy.
 

Saya Kisaragi

The Void Queen
Donor
Credits
0
Thief
Thief is one of the first optional Jobs you can obtain, along with Merchant. You can get it by following the sidequest that appears in Chapter 1 after you arrive in Ancheim. Speak to Profiteur in the mansion on the eastern side of Ancheim, then leave the city and head to the Oasis to the west to see an event. Finally, go to the cave to the northwest to see another event. Progress through the dungeon -- be careful of the gas-spitting Blind traps -- to take on Jackal and his henchman Khint.

Equip your magic users with silence-resisting abilities or accessories to counter Khint's annoying tendency to silence them, and focus on downing the henchman first -- he'll run away after you knock his HP down to approximately 50%. After this, you can concentrate on killing off Jackal, though note that he can heal himself with Potions for 600HP when he's in danger of falling.

Thieves have unmatched Agility and Dexterity, giving them a high hit rate and number of hits. This gives them enormous damage-dealing potential. They're best equipped with daggers or bows and light armor. Thieves' passive ability is Master Thief, which doubles the success rate of all stealing abilities.

Thief Abilities

  • Job Level 1: Steal (battle ability) -- 25% chance to steal an item from an enemy.
  • Job Level 2: Abate Wind (support ability, cost 1) -- Reduce damage from wind-based attacks.
  • Job Level 3: Speed 10% Up (support ability, cost 1) -- Self-explanatory.
  • Job Level 4: Life Thief (battle ability, 8MP) -- Deal normal damage, with a 75% chance to restore own HP by the damage dealt.
  • Job Level 5: Speed 20% Up (support ability, cost 2) -- Self-explanatory.
  • Job Level 6: Mug (battle ability, 16MP) -- Normal attack with a 25% chance to steal an item.
  • Job Level 7: Raid (support ability, cost 1) -- Raise all allies' BP by one when the party gets either a First Strike or +1 BP Bonus at the start of a battle.
  • Job Level 8: Dagger Lore (support ability, cost 1) -- Increase dagger proficiency to S-rank.
  • Job Level 9: GodSpeed Strike (battle ability, 2BP) -- Attack that uses Speed instead of Physical Attack, and ignores Physical Defense.
  • Job Level 10: Master Thief (support ability, cost 3) -- Same as Thief passive ability.
  • Job Level 11: Rob Blind (support ability, cost 2) -- Steal two items instead of one when successful.
  • Job Level 12: Shake Down (battle ability, 1BP) -- Steal items from all enemies with a 25% success rate per enemy.
  • Job Level 13: Speed 30% Up (support ability, cost 2) -- Self-explanatory.
  • Job Level 14: Burgle and Buff (support ability, cost 1) -- Increase Physical Attack by 25% when either successfully stealing or recovering HP with Life Thief.
 

Saya Kisaragi

The Void Queen
Donor
Credits
0
Merchant
After finishing the Thief sidequest, return to Ancheim and confront Profiteur. You'll be thrown into another boss fight where Profiteur fights alongside a familiar face: Khint.

Take down Khint first -- again, he'll leave before he's defeated -- and then concentrate on Profiteur, whose Takeover attack deals 300 damage regardless of physical defense. Black Mage's Damage Dispersion ability is useful here; otherwise, be ready for lots of healing and reviving.

Merchant is a tricky class to take advantage of, particularly early in the game, but it has some really interesting abilities that can benefit you if you use them effectively. They're also useful if you're short on cash -- their passive ability causes you to earn 1.5 times the normal amount of pg after a battle.

Merchant Abilities

  • Job Level 1: Pay to Play (battle ability) -- Spend your level times 50 pg to raise the target's Critical Rate by 300% for four turns. You can do this repeatedly up to a cap of 1,000%.
  • Job Level 2: Salesman (battle ability) -- Make an enemy buy a recovery item from you at 2.4 times the normal sale price.
  • Job Level 3: White Knight (support ability, cost 1) -- The ally with most HP protects you when you suffer a single-target physical attack while your HP is below 20%.
  • Job Level 4: Pharmacy (battle ability) -- Purchase a recovery item and use it on a target.
  • Job Level 5: Hedge Risk (battle ability) -- Halve the damage you suffer for five turns by spending money equal to half the damage.
  • Job Level 6: Takeover (battle ability) -- Spend your level times 50 pg to deal damage to one target equal to the amount of money you spent.
  • Job Level 7: BP Drink (battle ability) -- Purchase a BP recovery item and use it on a single target.
  • Job Level 8: Specular (support ability, cost 1) -- Either increase damage by 200% or do 0 damage. Risky!
  • Job Level 9: Money Up (support ability, cost 2) -- Increase money earned from battle.
  • Job Level 10: Millionaire (battle ability) -- Summon a friend in battle at a cost of 25pg per level.
  • Job Level 11: Dark Cartel (battle ability) -- Gain money from enemies when they recover HP.
  • Job Level 12: Full Leverage (battle ability) -- Double everything -- MP cost, HP recovery, damage dealt and taken.
  • Job Level 13: Low Leverage (battle ability) -- Halve everything -- MP cost, HP recovery, damage dealt and taken.
  • Job Level 14: Payoff (battle ability) -- Spend money to buy off the enemy and end the battle early.
 

Saya Kisaragi

The Void Queen
Donor
Credits
0
Spell Fencer
Leave Ancheim and wait on the world map until night falls. Enter the windmill marked with the sidequest icon and enter the secret passage. Work your way through the dungeon and fight the bosses to acquire both the Spell Fencer and Time Mage asterisks.

As for the battle itself, deal with Khamer first as his support abilities are a pain. Once he's down, concentrate on Khint.

Spell Fencer is made for exploiting weaknesses. By infusing your weapon with magic, you can combine the best of two worlds -- a class with high physical damage and magic to punch through an elemental weakness. Consequently, once you've levelled it, Spell Fencer's abilities are best used as a secondary job command rather than a character's main Job.

Spell Fencer abilities

  • Job Level 1: Sword Magic Lv.1 (job command) -- Enables Level 1 sword magic, which corresponds to Black Magic scrolls you've purchased.
  • Job Level 2: Sword Magic Lv.2 (job command) -- Enables Level 2 sword magic, which corresponds to Black Magic scrolls you've purchased.
  • Job Level 3: Firewall (support ability, cost 1) -- 50% chance to counterattack single-target physical attacks with fire damage.
  • Job Level 4: Sword Magic Lv.3 (job command) Enables Level 3 sword magic, which corresponds to Black Magic scrolls you've purchased.
  • Job Level 5: Auto-Aspir Blade (support ability, cost 1) -- Imbue a weapon with the ability to absorb MP for 10 turns, starting from the beginning of the battle.
  • Job Level 6: Magic Armor (support ability, cost 1) -- Casting sword magic also reduces damage for that element.
  • Job Level 7: Sword Magic Lv.4 (job command) -- Enables Level 4 sword magic, which corresponds to Black Magic scrolls you've purchased.
  • Job Level 8: Memento (support ability, cost 3) -- Restore 50% of MP for all allies when you suffer a KO. (Allies who are also KO'ed do not receive MP.)
  • Job Level 9: Sword Magic Lv. 5 (job command) -- Enables Level 5 sword magic, which corresponds to Black Magic scrolls you've purchased.
  • Job Level 10: Anti-Magic (support ability, cost 2) -- Raise Magic Defense for four turns when hit by magic. Same as Spell Fencer's passive ability.
  • Job Level 11: Sword Magic Amp (support ability, cost 1) -- MP cost of sword magic doubles, but damage dealt is 1.25 times greater.
  • Job Level 12: Sword Magic Lv.6 (job command) -- Enables Level 6 sword magic, which corresponds to Black Magic scrolls you've purchased.
  • Job Level 13: M.Def Specialize (support ability, cost 1) -- Lower Physical Defense by 25% and increase Magic Defense by 50%.
  • Job Level 14: Phantom Weapon (support ability, cost 3) -- Current weapon's damage is added to the damage of magic attacks.
 

Saya Kisaragi

The Void Queen
Donor
Credits
0
Time Mage
Time Mage's passive ability is Time Slip, which effectively allows you a free "do-over" if your party is wiped out in a battle. Time Mage learns this at Job Level 5 if you want to equip it to another Job.

Time Mage has some useful abilities, particularly in the support department, but doesn't get really good until much later. Its higher-level Job abilities can speed combat along for both you and your opponents as well as providing some useful buffs.

Time Mage also has a stupid hat.

  • Job Level 1: Time Magic Lv.1 (job command) -- Ability to use level 1 Time Magic (Quake, Regen, Slow) once you've bought the scrolls.
  • Job Level 2: M. Attack 10% Up (support ability, cost 1) -- Raise Magic Attack by 10%.
  • Job Level 3: Slow Parry (support ability, cost 1) -- 50% chance to apply Slow to attacker when taking a single-target physical attack.
  • Job Level 4: Time Magic Lv.2 (job command) -- Ability to use level 2 Time Magic (Quakera, Teleport Haste) once you've bought the scrolls.
  • Job Level 5: Time Slip (support ability, cost 3) -- Same as Time Mage's passive ability.
  • Job Level 6: Time Magic Lv.3 (job command) -- Ability to use level 3 Time Magic (Gravity, Veil, Slowga) once you've bought the scrolls.
  • Job Level 7: Stop Immunity (support ability, cost 1) -- Self-explanatory.
  • Job Level 8: Time Magic Lv.4 (job command) -- Ability to use level 4 Time Magic (Comet, Veilga, Hastega) once you've bought the scrolls.
  • Job Level 9: T.Magic MP Save (support ability, cost 2) -- Reduces MP cost of Time Magic by 25%.
  • Job Level 10: Time Magic Lv.5 (job command) -- Ability to use level 5 Time Magic (Quakega, Stop, Quick) once you've bought the scrolls.
  • Job Level 11: Slow World (support ability, cost 2) -- Lower BP of all allies and enemies by 1 once every two turns.
  • Job Level 12: Time Magic Lv.6 (job command) -- Ability to use Level 6 Time Magic (Meteo, Reraise, Gravitiga) once you've bought the scrolls.
  • Job Level 13: M. Attack 30% Up (support ability, cost 3) -- Raise Magic Attack by 30%.
  • Job Level 14: Hasten World (support ability, cost 2) -- Raise BP of all allies and enemies by 1 at the end of each turn, including KO'ed allies.
 

Saya Kisaragi

The Void Queen
Donor
Credits
0
Ranger
After returning from the Water Temple, speak to all the NPCs marked with the blue sidequest icon on your map in Florem. Leave the city and head north-east. Defeat the grunts and continue east until you see a big tree. Beat the boss Artemia Venus and you'll be rewarded with the Ranger asterisk.

Artemia is accompanied by a Legion Impaler and a Legion Mage. Knock these two down first, since neither of them have many HP. Meanwhile, Artemia has a number of very powerful attacks and likes to Default between them in order to charge up BP. Stagger your attacks so you are Defaulting while she is Braving, and vice versa. Default-piercing abilities such as the Monk's Qigong Wave are particularly useful here, for obvious reasons.

Ranger is great in the early game, with consistently high damage output and the ability to exploit enemy types rather than enemy weaknesses. Later in the game, however, it becomes less effective as other classes overtake it in terms of unique special abilities. Rangers are best equipped with bows, which makes them particularly effective against flying enemies.

Ranger Abilities

  • Job Level 1: Targeting (battle ability, 12MP) -- Deal 1.25 times normal damage.
  • Job Level 2: Bug Slayer (battle ability, 8MP) -- 1.5 times normal damage to bug-type enemies.
  • Job Level 3: Plant Slayer (battle ability, 8MP) -- 1.5 times normal damage to plant-type enemies.
  • Job Level 4: Beast Slayer (battle ability, 8MP) -- 1.5 times normal damage to beast-type enemies.
  • Job Level 5: Paralyze Immunity (support ability, cost 1) -- Self-explanatory.
  • Job Level 6: Aerial Slayer (battle ability, 8MP) -- 1.5 times normal damage to aerial enemies.
  • Job Level 7: Aquatic Slayer (battle ability, 8MP) -- 1.5 times normal damage to aquatic enemies.
  • Job Level 8: Bow Lore (support ability, cost 1) -- Raise bow proficiency to S-rank.
  • Job Level 9: Dragon Slayer (battle ability, 8MP) -- 1.5 times normal damage to dragon-type enemies.
  • Job Level 10: Undead Slayer (battle ability, 8MP) -- 1.5 times normal damage to undead enemies.
  • Job Level 11: Demon Slayer (battle ability, 8MP) -- 1.5 times normal damage to demonic enemies.
  • Job Level 12: Hawkeye (support ability, cost 1) -- Raise accuracy by 100%.
  • Job Level 13: Precision (support ability, cost 2) -- If all hits in a regular attack connect, damage increases by 3% for each attack.
  • Job Level 14: Multiburst (battle ability, 1BP) -- Attack four random targets, dealing 0.6 times the damage of a regular single attack each time.
 

Saya Kisaragi

The Void Queen
Donor
Credits
0
Summoner
To acquire the Summoner asterisk, go to the Florem weapon shop after returning from the Water Temple. Leave Florem and head north-west and enter the garden. Proceed through the garden, taking care not to step on the Silence-inducing blue flowers, and proceed to the boss Mephilla Venus.

Take out Mephilla's supporting grunts as quickly as possible so you can concentrate on surviving her powerful summon attacks, which come every three turns. She can also summon further grunts throughout the fight, so knock them down if they show up.

Learning new Summon spells is a little different to learning other spells. In order to acquire them, you must track down the Elemental Sages around the world and survive an attack from their summon spells. You won't be able to do this until you can access the relevant area in the story, and you won't be able to use the summon you've acquired until Summoner is at an appropriate Job Level, so bear this in mind before going on a pilgrimage.

Your first summon, Girtablublu, comes with the asterisk. The second, Hraesvelgr, is acquired from the Wind Sage in the Wind Temple. Ziusudra's Sin is acquired from the Water Sage at Mt. Chelate. Prometheus's Flame is acquired from the Fire Sage in the Fire Temple. Deus Ex is acquired from the Thunder Sage in the Everlast Tower. And finally, Susano-o is acquired from a secret area only accessible from chapter 6 onwards -- head to the north-east of the map and look for a crescent-shaped island.

Summoner Abilities

  • Job Level 1: Summoning Lv.1 (battle ability, 40MP) -- Summon Girtablublu.
  • Job Level 2: Abate Lightning (support ability, cost 1) -- Reduce damage taken from lightning-based attacks.
  • Job Level 3: Summoning Lv.2 (battle ability, 40MP) -- Summon Hraesvelgr.
  • Job Level 4: Summoning Lv.3 (battle ability, 40MP) -- Summon Ziusudra's Sin.
  • Job Level 5: Friendship (support ability, cost 1) -- Affinity growth rate with summoned friends doubles.
  • Job Level 6: Summoning Amp (support ability, cost 2) -- Raise MP cost of summon magic by 1.25 while also increasing damage by 1.25.
  • Job Level 7: Summoning Lv.4 (battle ability, 40MP) -- Summon Prometheus's Flame.
  • Job Level 8: Summoning Lv.5 (battle ability, 40MP) -- Summon Deus Ex.
  • Job Level 9: Substitute Summon (support ability, cost 3) -- Automatically summon when KO'ed.
  • Job Level 10: Summoning Lv.6 (battle ability, 60MP) -- Summon Susano-o.
  • Job Level 11: Convert MP (support ability, cost 3) -- Restore MP equal to 1% of damage sustained. Same as Summoner's passive ability.
  • Job Level 12: Summon Rush (support ability, cost 3) -- Increase summon power based on how much you've used each summon.
  • Job Level 13: Danger Summon (support ability, cost 3) -- Automatically summon when health is low.
  • Job Level 14: Amp Friends (support ability, cost 1) -- Boost damage, recovery amount, chance of imparting status ailment and number of terms buffing/debuffing when using Summon Friend -- best used in combination with a Summon Friend who is using a Special Move.
 

Saya Kisaragi

The Void Queen
Donor
Credits
0
Valkyrie
After the Flower Festival in Florem, leave Florem and wait on the world map until night falls. Return to Florem to see an event, then go north to Witherwood. Work your way through the dungeon to the boss Einheria Venus to score the Valkyrie asterisk.

Einheria alternates between Crescent Moon, which does damage to all allies, and Jump, which does high damage to a single ally on the next turn. If she uses Jump, Defaulting is a good idea as this will reduce the damage and provide you with an extra BP to use next turn. When she's low on HP, she'll cast Spirit Barrier, which causes her to absorb damage through her MP rather than HP for 10 turns or until you deplete her MP.

Valkyries are strong, spear-using fighters somewhat akin to Final Fantasy's Dragoon Job. They are very reliant on BP, though, which means they might not get to attack quite as often as some other classes if you're not careful about managing these precious points. They're also in possession of an arguably somewhat overpowered combo attack when paired with a Time Mage -- the Time Mage should use their Job Level 14 ability Hasten World while the Valkyries in the party use High Jump, though this is only effective if you are faster to act than the enemies.

Equipping a spear on a Valkyrie is a must not only for their S-rank proficiency, but also for the fact that Jump abilities do significantly more damage when using a spear.

Valkyrie Abilities

  • Job Level 1: Crescent Moon (battle ability, 1BP) -- Attack all enemies.
  • Job Level 2: Jump (battle ability, 1BP) -- Leap off-screen and re-appear next turn, dealing double damage, triple if equipped with a spear.
  • Job Level 3: Spear Lore (support ability, cost 1) -- Increase spear proficiency to S-rank.
  • Job Level 4: Judgement (battle ability, 2BP) -- Deal triple damage to one target.
  • Job Level 5: Spirit Barrier (battle ability, 10MP) -- Incoming damage is reduced to 10% and applied to your MP gauge for 10 turns, or until you run out of MP.
  • Job Level 6: Soul Crush (battle ability, 16MP) -- Reduce one enemy's MP by 10% of your normal attack damage.
  • Job Level 7: BP Skill Amp (support ability, cost 3) -- BP-powered skills increase their cost by 1, but damage increases by 1.5 times.
  • Job Level 8: Decimate (battle ability) -- Allies and enemies with 10% or less HP remaining all suffer damage equal to their remaining HP.
  • Job Level 9: High Jump (battle ability, 2BP) -- As Jump, only with triple normal damage, or 4.5 times normal damage if equipped with a spear.
  • Job Level 10: Pierce Default (support ability, cost 2) -- Damage is not reduced by enemies' Default.
  • Job Level 11: Soul Mates (support ability, cost 1) -- Physical and Magic Attack increase by 25% for five turns whenever an ally suffers a KO. Same as Valkyrie's passive ability.
  • Job Level 12: Aerials (support ability, cost 1) -- Jump abilities increase their BP cost by one, take an extra turn to resolve and increase their damage by 1.5 times.
  • Job Level 13: Sky High (support ability, cost 2) -- Begin a battle in the air, diving down to attack on the first turn for double normal damage.
  • Job Level 14: Super Jump (battle ability, 3BP) -- As Jump, only with double damage on all enemies two turns later.
 

Saya Kisaragi

The Void Queen
Donor
Credits
0
Red Mage
To acquire the Red Mage asterisk, it's yet another sidequest in Florem. This time, it occurs the third time you come back to the town, after speaking with Yulyana.

Speak to the man dressed in flamboyant red clothes -- he's marked with the usual blue sidequest marker on the map. Watch the event. Then continue the story through the Flower Festival sequences and rest at the Inn.

Leave Florem and wait on the world map until night, then re-enter and head to the northern area. Speak to the girl with the sidequest marker, then move near DeRosa to trigger the next event. Tiz and Ringabel's espionage efforts will end in failure, so rest, leave Florem, wait for night and try again. You will fail again, so rest, leave Florem, wait for night and try a third time, this time with Edea in the Bravo Bikini as bait. Before you do this, equip Edea with a Rebuff Locket if you have one. You'll end up in an underground room and have to fight DeRosa. Defeating him will reward you with the Red Mage asterisk.

Edea will begin the fight in a Charmed state -- unless you equipped the aforementioned accessory -- so your first priority should be curing her. After that, be ready to deal with DeRosa's variety of status attacks, which will inflict Charmed (attack party members or heal DeRosa) or Fear (unable to use Brave) and be wary of his Revenge ability which occasionally gives him a bonus BP when you attack him. He's fond of using Brave until his BP are well into the negatives, though, which will give you a few turns to heal, recuperate and spam some Brave attacks to whittle him down.

Red Mages have fairly average all-round stats, but their main strength is the ability to use both White and Black Magic up to level 4. Their moderate Mind and Intelligence stats mean they're not as good at either as a dedicated White or Black Mage, but they make up for this by being more able to both stand up to punishment and dole out physical damage. Their reactive abilities such as Revenge (which works the same way as it did when you were fighting DeRosa), Turn Tables and Adrenaline are also very powerful, and good support abilities for heavy BP users such as Valkyries.

Red Mage Abilities

  • Job Level 1: W&B Magic Level 1 (job command) -- Use White and Black Magic you have the scrolls for, up to level 1.
  • Job Level 2: MP 20% Up (support ability, cost 2) -- Self-explanatory.
  • Job Level 3: W&B Magic Level 2 (job command) -- Use White and Black Magic you have the scrolls for, up to level 2.
  • Job Level 4: Turn Tables (support ability, cost 1) -- Gain 1BP when you evade an enemy attack.
  • Job Level 5: MP Free in a Pinch (support ability, cost 2) -- MP cost for magic drops to zero when you have 20% HP or less.
  • Job Level 6: W&B Magic Level 3 (job command) -- Use White and Black Magic you have the scrolls for, up to level 3.
  • Job Level 7: Adrenaline (support ability, cost 1) -- Gain 1BP when you defeat an enemy.
  • Job Level 8: Magic Save (support ability, cost 3) -- Reduce MP costs by 25%.
  • Job Level 9: BP Recover (support ability, cost 1) -- Gain 2BP when suffering a status ailment.
  • Job Level 10: W&B Magic Level 4 (job command) -- Use White and Black Magic you have the scrolls for, up to level 4.
  • Job Level 11: Revenge (support ability, cost 2) -- 25% chance to gain 1BP when taking damage. Same as Red Mage's passive ability.
  • Job Level 12: Revival (support ability, cost 3) -- Gain 2BP when taking damage while low on HP.
  • Job Level 13: An Eye for an Eye (support ability, cost 1) -- When your HP drops below 20%, critical chance increases by 900% for five turns.
  • Job Level 14: In the Red (support ability, cost 1) -- Raise magic damage when you have negative BP.
 

Saya Kisaragi

The Void Queen
Donor
Credits
0
Salve-Maker
Better known as Chemist in other Final Fantasy games, Salve-Maker is an excellent support class. It's obtained as a difficult-to-miss sidequest when you go to Starkfort to find Egil. Take the left stairway in Starkfort to find Dr. Qada, whom you must defeat to obtain the asterisk.

Qada is a tricky fight thanks to his healing abilities and poisonous status attacks. When he charges up his BP, he's preparing to use his ultimate Dark Breath attack, which inflicts damage on you equal to the damage he has taken so far in the fight -- up to 9999 if you're already a goodly way through the battle. Also be wary of his regenerative abilities -- bring along a White Mage to dispel his beneficial status effects to make your life a little easier.

Salve-Maker's main ability is Compounding, which is similar to the Mix command in earlier Final Fantasy games. There are 89 different recipes to use, which is a little outside of the scope of this specific guide, but watch out for a detailed Compounding guide here on USgamer shortly.

Salve-Maker Abilities

  • Job Level 1: Compounding (battle ability) -- Mix two items to create a special effect.
  • Job Level 2: First Aid (battle ability) -- Restore HP to whoever has the least HP at the end of the turn.
  • Job Level 3: Experiment (battle ability) -- Turn a consumable item into an attack item.
  • Job Level 4: Attack Item Amp (support ability, cost 1) -- Enhance attack items' power.
  • Job Level 5: Inoculate (battle ability) -- Consumable items normally used to cure status effects can instead be used to confer immunity to the effect in question for six turns.
  • Job Level 6: Auto-Potion (support ability, cost 1) -- Automatically use a Potion when you take damage.
  • Job Level 7: Shorten Ailment (support ability, cost 1) -- Chances of status effects naturally expiring at the start of a turn increased by 50%. Does not apply to Doom.
  • Job Level 8: Widen Area (battle ability, 1BP) -- Use an item normally intended for a single target on all targets.
  • Job Level 9: Healing Lore (support ability, cost 2) -- Double all HP and MP healing effects, whether from items or magic. Same as Salve-Maker's passive ability.
  • Job Level 10: Turn Toxic (battle ability) -- Throw a recovery item at an enemy, inflicting poison and dealing damage equal to what the item would normally heal.
  • Job Level 11: Auto-Phoenix (support ability, cost 2) -- Automatically use a Phoenix Feather (if you have one) if an ally is in the KO state during the last command in your turn.
  • Job Level 12: Collect (battle ability) -- Get an item. What you get depends on your location.
  • Job Level 13: Resurrect (battle ability) -- Revive all KO'ed allies with 25% HP.
  • Job Level 14: Feel No Pain (support ability, cost 3) -- Any damage taken is "delayed" for two turns, after which you'll take it all at once, unless you finish the battle before then, of course.
 

Saya Kisaragi

The Void Queen
Donor
Credits
0
Holy mother of god yuuki, that's a lot of text
Its required cause there are bosses in this game that can destroy your team with ease if you dont know what they are packing. plus its good to understand what the jobs do too.
 

Saya Kisaragi

The Void Queen
Donor
Credits
0
Performer
Performer has some of the best costumes in the game. Ringabel's in particular is quite something. In order to acquire this Job, you'll need to complete yet another sidequest, this time after acquiring the poison sample from Grapp Keep.

Speak with Captain Goodman in Eisenburg's battle fortress. Select the third choice and watch the event. Then you'll have to speak to a whole bunch of NPCs around the world, each of whom is marked with a blue sidequest icon on the map. First head to the bar in Grandship, then Ancheim, then Caldisla, then Florem and finally Hartschild City. Then return to Grandship and speak with the old lady in the bar again. Last of all, return to the fortress in Eisenburg, speak with Captain Goodman again and choose the third choice. You'll then get to fight Praline, whom you'll need to defeat for the Performer asterisk.

Praline is accompanied by a set of various grunts and uses her Performer skills to buff them up to dangerous levels. Try to knock them down as quickly as possible -- Valkyrie's Crescent Moon skill is useful here, since it hits all opponents -- and then deal as much damage to Praline as you can. She may summon another set of grunts during the fight -- this second crowd will have lower HP, though, so don't panic.

Performer is probably the best support class in the game, with a wide variety of useful buffs that will make your life a whole lot easier. It can be used as a secondary job command, but Performer's passive ability reduces MP costs for Singing abilities by 50% so it's best used as a primary Job, perhaps paired with something like White Magic for the ultimate support-healing combo.

Performer Abilities

  • Job Level 1: Love Power (battle ability, 30MP) -- Raise all targets' Physical Attack by 25% for four turns.
  • Job Level 2: Love Rush (battle ability, 24MP) -- Raise all targets' Speed by 25% for four turns.
  • Job Level 3: One More for You (battle ability, 26MP) -- Give 1BP to a target.
  • Job Level 4: Got Your Back (battle ability, 24MP) -- Raise all targets' Physical Defense by 25% for four turns.
  • Job Level 5: Key to Your Heart (battle ability, 24MP) -- Raise all targets' Magical Defense by 25% for four turns.
  • Job Level 6: Support Amp (support ability, cost 1) -- Increase stat-raising effects on yourself by 10%, decrease stat-lowering effects on yourself by 10%.
  • Job Level 7: Little Devil (battle ability, 24MP) -- Raise all targets' Magic Attack by 25% for four turns.
  • Job Level 8: Catch Me (battle ability, 12MP) -- Draw all enemy attacks for five turns.
  • Job Level 9: Buff Up (support ability, cost 2) -- Increase Physical Attack, Magical Attack, Physical Defense and Magical Defense by 5% each turn for five turns from the start of battle.
  • Job Level 10: Prolong Support (support ability, cost 1) -- Double the length of time stat-raising buffs on yourself last.
  • Job Level 11: Charm Immunity (support ability, cost 1) -- Self-explanatory.
  • Job Level 12: Save Singing MP (support ability, cost 2) -- Halve the cost of Singing abilities. Same as Performer's passive ability.
  • Job Level 13: Zero Sum (battle ability, 15MP) -- Reduce BP to zero for either all enemies or all allies who have one or more BP.
  • Job Level 14: My Hero (battle ability, 2BP) -- Raise all allies' BP by one.
 

testing

Top