Bravely Default: Where the Fairy Flies

Saya Kisaragi

The Void Queen
Donor
Credits
0
Pirate
Pirate is one of the strongest classes in the game, though it has been toned down a little since the original Japanese version of Bravely Default from 2012. It's still a solid choice if you like inflicting physical damage, however.

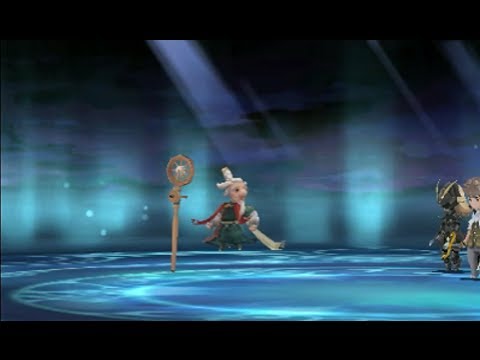
To unlock Pirate, head to the port in Eisenburg any time after you're supposed to head to Grapp Keep. Speak with Datz to hear a story, then head out in your ship and look for a foggy area. The exact location is random, but it's usually somewhere in the vicinity of Grandship. When you've found the right area, you'll see an event. Choose the second option when prompted to visit the Ghost Ship, then speak with Barbarossa to begin the battle for the Pirate asterisk.

Barbarossa is weak against Lightning, so take advantage of this fact when possible. Be wary of his BP skills, however -- he tends to use 2BP prior to using his most powerful attacks, so time your Defaults carefully to mitigate as much damage as possible; unleash a Special Move and unload all your BP on him if you're feeling, well, Brave.

Pirate Abilities

  • Job Level 1: Double Damage (battle ability, 25% MP) -- Single attack with twice the normal damage.
  • Job Level 2: Provoke (battle ability) -- Draw the attention of all enemies.
  • Job Level 3: Shell Split (battle ability, 9MP) -- Attack with normal power on a single target, plus 25% penalty to target's Physical Defense for four turns.
  • Job Level 4: Scale Strip (battle ability, 9MP) -- As Shell Split, but with Magic Defense reduction instead.
  • Job Level 5: Shin Smash (battle ability, 9MP) -- As Shell Split, but with Speed reduction instead.
  • Job Level 6: Mass Attack (battle ability, 1BP) -- Allies with 20% or less HP attack at the same time as you.
  • Job Level 7: Berserk (battle ability) -- Increase physical attack by 50% and automatically attack for six turns.
  • Job Level 8: Adrenaline Rush (support ability, cost 2) -- Physical Attack and Physical Defense both rise by 50% for five turns when you have 20% HP or less. Same as Pirate's passive ability.
  • Job Level 9: P.Attack 20% Up (support ability, cost 2) -- Raise Physical Attack by 20%.
  • Job Level 10: Defang (battle ability, 9MP) -- As Shell Split, but with Physical Attack reduction instead.
  • Job Level 11: Skull Bash (battle ability, 9MP) -- As Shell Split, but with Magic Attack reduction instead.
  • Job Level 12: Axe Lore (support ability, cost 1) -- Raise axe proficiency to S-rank.
  • Job Level 13: Torrent (battle ability, 2BP) -- Water-based attack that hits one target 16 times for 0.3 times normal physical damage.
  • Job Level 14: Amped Strike (battle ability, 50% MP) -- Deal quadruple damage on one target.
 

Saya Kisaragi

The Void Queen
Donor
Credits
0
Ninja
After bringing Egil to the inn in Caldisla, you can pursue the Ninja sidequest. Go to Hartschild City and into Goodman's Mansion to witness an event. Then do one of two things: either interrogate everyone in the building, try to leave the mansion and then use the key on the basement, or simply examine the servant's body twenty times to automatically trigger the next event. Either way, you'll be fighting Kikyo.

Kikyo has two things to watch out for: firstly, she hits very hard indeed, to try to mitigate damage as much as possible; secondly, her Utsusemi ability that lets her evade a single physical attack. If she uses this, hit her with a weak ability or normal attack to remove the evasion buff, then hurl as much damage as you can at her in one go.

Ninja is a good multi-purpose class. Dual-wielding weapons makes for formidable damage, but with abilities such as Utsusemi they make decent evasion tanks, too. Equip a pair of decent daggers to get the most out of them.

Ninja Abilities

  • Job Level 1: Shippuujinrai (battle ability, 16MP) -- Jump the turn order and perform a physical attack at the start of the turn.
  • Job Level 2: Transience (support ability, cost 1) -- After evading an attack, counterattack automatically.
  • Job Level 3: Evasion 10% Up (support ability, cost 1) -- Self-explanatory.
  • Job Level 4: Utsusemi (battle ability) -- Evade one physical attack.
  • Job Level 5: Comeback Kid (support ability, cost 1) -- Raise Magic and Physical Attack by 25% for each physical attack evaded. Buff caps at 150%.
  • Job Level 6: Ikkikasei (battle ability, 1BP) -- Increase hit count on your attacks next turn.
  • Job Level 7: Cleave (support ability, cost 1) -- Chance to automatically attack again after defeating an enemy with a normal attack.
  • Job Level 8: Evasion 20% Up (support ability, cost 2) -- Self-explanatory.
  • Job Level 9: Shunshin (battle ability) -- Raise evasion to maximum for six turns.
  • Job Level 10: Kairai (battle ability) -- Divert enemy attacks to another ally for the rest of this turn.
  • Job Level 11: Dual Wield (support ability, cost 1) -- No penalties to weapons' Physical Attack bonuses when dual-wielding. Same as Ninja's passive ability.
  • Job Level 12: Kakuremi (battle ability) -- Lower your chance of being targeted by enemies to the lowest possible level for five turns.
  • Job Level 13: Evasion 30% Up (support ability, cost 3) -- Self-explanatory.
  • Job Level 14: Frenetic Fighting (support ability, cost 2) -- Increase the cap on number of hits in a normal attack from 16 to 32.
 

Saya Kisaragi

The Void Queen
Donor
Credits
0
Swordmaster
After clearing the Fire Temple, head back to Starkfort. The central passage that was previously blocked off is now open -- head in there and work your way to the top to fight Kamiizumi for the Swordmaster asterisk.

Fighting Kamiizumi is a bit of a pain because all his attacks are counter-based, meaning you'll take damage whenever you deal damage. Charge up your BP and rush him, but make sure there's someone ready to heal the damage you'll take in the process.

Swordmaster is a difficult class to use due to its heavy focus on countering, but when paired with damage reduction or evasion abilities such as those Ninja offers, it can be a powerful addition to your lineup. Its ultimate skill, which reduces MP costs to zero for two turns, is also useful when combined with expensive abilities such as Pirate's Amped Strike.

Swordmaster Abilities

  • Job Level 1: Nothing Ventured (battle ability) -- Take half damage if hit by a physical attack; counterattack at double damage.
  • Job Level 2: Abate Earth (support ability, cost 1) -- Reduce damage from Earth attacks.
  • Job Level 3: Katana Lore (support ability, cost 1) -- Raise katana proficiency to S-rank.
  • Job Level 4: Squeaky Wheel (battle ability, 1BP) -- Reduce target's BP by one. Only successful 30% of the time on bosses.
  • Job Level 5: Multitask (support ability, cost 2) -- 25% chance of a free extra attack when making a normal attack.
  • Job Level 6: Counter (support ability, cost 2) -- 60% chance to automatically counterattack when hit by a single-target physical attack. Same as Swordmaster's passive ability.
  • Job Level 7: Confuse Immunity (support ability, cost 1) -- Self-explanatory.
  • Job Level 8: Before Swine (battle ability) -- Halve magic damage; counterattack at triple normal damage.
  • Job Level 9: Counter Amp (support ability, cost 1) -- Increase damage of counters to 1.5 times normal attack power.
  • Job Level 10: Know Thine Enemy (battle ability) -- Pick an enemy. If hit by a single-target attack from that enemy, counter at quadruple normal damage.
  • Job Level 11: Redoubled Effort (support ability, cost 2) -- The higher your BP, the stronger your attacks.
  • Job Level 12: The Worm Turns (battle ability) -- If hit when your HP is below 20%, deal 7.5 times normal damage as a counterattack. Obviously you need to actually survive the attack for this to work.
  • Job Level 13: Slow and Steady (support ability, cost 1) -- After Defaulting, raise Speed for two turns, up to a maximum of 150%.
  • Job Level 14: Free Lunch (battle ability) -- Set MP cost to zero for two turns.
 

Saya Kisaragi

The Void Queen
Donor
Credits
0
Arcanist
To obtain this asterisk, simply defeat Victoria in Chapter 4.

Arcanist relies heavily on inflicting status effects, making it less than useful in boss battles, since most bosses are immune to status effects. It pairs nicely with Black Mage, however, since a number of abilities are specifically designed to boost Black Magic.

A difficult class to use effectively, but one worth exploring if you've been a heavy magic user.

Arcanist Abilities

  • Job Level 1: Corpse (battle ability, 4MP) -- 75% chance to inflict Doom.
  • Job Level 2: Black Magic Amp (support ability, cost 1) -- Raise MP cost of Black Magic by 1.5 times; increase damage by 1.25 times.
  • Job Level 3: Exterminate (battle ability, 4MP) -- Heavy damage to all Poisoned enemies.
  • Job Level 4: Absorb M. Damage (support ability, cost 1) -- Recover HP equal to 25% of the damage taken from a magic attack. Same as Arcanist's passive ability.
  • Job Level 5: Twilight (battle ability, 7MP) -- Instakill all Sleeping enemies except bosses.
  • Job Level 6: Save BM MP (support ability, cost 2) -- Lower Black Magic's MP cost by 25%.
  • Job Level 7: Sacrifice (battle ability) -- Take damage equal to 25% of your maximum HP to increase your Magic Attack by 50% for three turns.
  • Job Level 8: Zero (support ability, cost 1) -- Magic does 1.5 times normal damage when your current MP is divisble by 10 (has a 0 on the end).
  • Job Level 9: Convergence (support ability, cost 3) -- Allows magic that may normally only be group-cast to be cast on a single target at 1.5 times its normal effect.
  • Job Level 10: Annihilation (battle ability, 4MP) -- Dark damage on all enemies and allies with -1BP or less.
  • Job Level 11: Status Ailment Amp (support ability, cost 1) -- Increase chance of inflicting status ailments.
  • Job Level 12: Iniquity (battle ability, 4MP) -- Dark damage on all enemies and allies with 1BP or more.
  • Job Level 13: Max Black Magic (support ability, cost 3) -- MP cost of Black Magic doubles; effect increases by 1.5 times. Can be used at the same time as Black Magic Amp.
  • Job Level 14: Interment (battle ability, 151MP) -- Strong dark damage to all enemies.
 

Saya Kisaragi

The Void Queen
Donor
Credits
0
Spiritmaster
To obtain Spiritmaster, simply defeat Victor in Chapter 4.

Spiritmaster is an excellent support class, and pairs nicely with White Mage thanks to a number of its abilities that boost White Magic in the same way Arcanist boosts Black Magic. By mastering Spiritmaster, you can help build some truly excellent healing characters who can get you through some of the game's toughest challenges.

Spiritmaster Abilities

  • Job Level 1: Spirit Ward (battle ability, 16MP) -- Nullify all elemental damage on one ally for four turns.
  • Job Level 2: Auto-Shell (support ability, cost 1) -- Automatically cast Shell on yourself for ten turns at the start of a battle.
  • Job Level 3: M.Defense 20% Up (support ability, cost 2) -- Increase Magic Defense by 20%.
  • Job Level 4: Fairy Aid (battle ability, 1BP) -- Target deals 1.5 times normal damage with elemental attacks for five turns.
  • Job Level 5: Convert BP (battle ability) -- 25% of your maximum MP is turned into 2BP.
  • Job Level 6: Save WM MP (support ability, cost 2) -- Reduce the cost of White Magic by 25%.
  • Job Level 7: Adaptation (battle ability, 32MP) -- One ally absorbs all elemental damage for four turns.
  • Job Level 8: Stillness (battle ability, 2BP) -- No-one takes any damage for two turns.
  • Job Level 9: Holy One (support ability, cost 2) -- Physical Attack drops by 25% but recovery magic is boosted by 2.5 times.
  • Job Level 10: Greater Spirit Ward (battle ability, 2BP) -- All allies take half damage from elemental attacks for four turns.
  • Job Level 11: Fairy Ward (battle ability, 2BP) -- All allies are immune to all status effects for five turns.
  • Job Level 12: Moderation (battle ability, 2BP) -- Allies and enemies with 1BP or more reduce their BP by one; allies and enemies with -1BP or less increase their BP by one.
  • Job Level 13: Enigma (battle ability, 3BP) -- All allies nullify all elemental damage for four turns.
  • Job Level 14: Maximize HP (support ability, cost 3) -- Maximum HP doubles in battle.
 

Saya Kisaragi

The Void Queen
Donor
Credits
0
Dark Knight
To acquire Dark Knight, simply defeat Alternis at the end of Chapter 4.

Dark Knight, like its traditional Final Fantasy incarnation, is largely concerned with voluntarily taking HP damage in exchange for some powerful abilities -- or leveraging damage taken to trigger other abilities. It pairs well with Spiritmaster to mitigate some of the risk inherent in a job so dependent on HP.

Dark Knight Abilities

  • Job Level 1: Dark Bane (battle ability) -- Sacrifice 20% of your maximum HP to deal 1.25 times normal damage.
  • Job Level 2: Abate Dark (support ability, cost 1) -- Reduce damage from Dark attacks.
  • Job Level 3: Adversity (support ability, cost 1) -- Physical Attack, Physical Defense, Magic Attack and Magic Defense all increase by 10% for three turns each time you take damage equal to or greater than 25% of your maximum HP. Same as Dark Knight's passive ability.
  • Job Level 4: Demon Master (battle ability, 6MP) -- Charm one Demon-type enemy.
  • Job Level 5: See You In Hell (support ability, cost 3) -- Deal quadruple damage to all enemies when you are KO'ed. Does not work if you have Reraise on you.
  • Job Level 6: Minus Strike (battle ability, 6MP) -- Deal damage equal to the amount of damage you've taken.
  • Job Level 7: Helm Lore (support ability, cost 1) -- Raise helm proficiency to S-rank.
  • Job Level 8: Black Bane (battle ability) -- Sacrifice 30% HP to hit all enemies.
  • Job Level 9: Gloom (support ability, cost 1) -- Dark attacks are stronger.
  • Job Level 10: Absorb Magic (battle ability) -- Nullify damage from magic attacks and recover MP equal to the casting cost of the spell that hit you.
  • Job Level 11: Dark Nebula (battle ability) -- Sacrifice 20% of your maximum HP to hit all allies and enemies with a Dark attack at four times your normal attack power.
  • Job Level 12: P.Attack 30% Up (support ability, cost 3) -- Raise Physical Attack by 30%.
  • Job Level 13: Life or Death (battle ability) -- Inflict Doom on yourself, but enjoy increased Physical Attack, Physical Defense, Magic Attack and Magic Defense until you keel over dead.
  • Job Level 14: Rage (battle ability, 2BP) -- Dark Bane repeats up to 5 times or until your HP reaches 1.
 

Saya Kisaragi

The Void Queen
Donor
Credits
0
Templar
Where there's a Dark Knight, a Paladin-equivalent surely follows, and Templar is Bravely Default's Paladin. Acquire this asterisk partway through Chapter 4 by beating Braev Lee.

Templar makes a great replacement for Knight. Its ability to increase the BP cap by one isn't to be sniffed at, either, and this makes it a very strong class that is a good option as your primary tank. Combine with classes good at attracting the attention of enemies like Pirate to put up the ultimate defensive barrier in front of the rest of your party.

Templar Abilities

  • Job Level 1: Heart Strike (battle ability, 1BP) -- Guaranteed critical hit.
  • Job Level 2: Abate Light (support ability, cost 1) -- Reduce damage from Light attacks.
  • Job Level 3: P. Defense 20% Up (support ability, cost 2) -- Raise Physical Defense by 20%.
  • Job Level 4: Giant Slayer (battle ability, 16MP) -- Hit a target with more HP than you for 1.5 times normal damage.
  • Job Level 5: Magic Critical (support ability, cost 1) -- 15% chance of critical hits when using magic, either offensive or recovery.
  • Job Level 6: Default Guard (support ability, cost 1) -- Reduces incoming damage during Default by 75%.
  • Job Level 7: Rampart (battle ability, 2BP) -- Protect all allies from one physical attack.
  • Job Level 8: Item Critical (support ability, cost 1) -- 15% chance of critical hits when using items, either offensive or recovery.
  • Job Level 9: Radiant Blast (battle ability, 40MP) -- Ignores Default and deals 1.5 times normal damage to one target.
  • Job Level 10: Critical Amp (support ability, cost 2) -- Damage increase from critical hits increases from 2 times to 2.5 times.
  • Job Level 11: BP Limit Up (support ability, cost 1) -- Raises BP cap to 4. Same as Templar's passive ability.
  • Job Level 12: Desperation (battle ability) -- Attack by adding Physical Defense to Physical Attack for one turn, but Physical Defense is reduced to minimum for the rest of that turn.
  • Job Level 13: Armor Lore (support ability, cost 1) -- Increase armor proficiency to S-rank.
  • Job Level 14: Heaven's Gate (battle ability, 3BP) -- Unleash light attacks that increase in number the more BP you have, each of which strikes a random enemy.
 

Saya Kisaragi

The Void Queen
Donor
Credits
0
Conjurer
To acquire the Conjurer asterisk, head to Yulyana's house after releasing three crystals and speaking with Yulyana at Vestment Caves. Read the letter, then head to Eternia Central Command to find Yulyana on the last floor. Then you'll need to defeat a whole bunch of other bosses, all of whom you've previously encountered if you have the other asterisks.

First, go to Edea's room in Central Command and fight Alternis. Next, enter the city of Eternia and go into the Healing Tower to fight Braev. After that, head to the Twilight Ruins to fight Einheria, Artemia and Mephilia all at the same time -- a tough battle for sure. Then head to Norende Ravine to see an event, and head back to Yulyana's house for the final battle in this quest.

The fight against Yulyana is a difficult one with a lot of one-hit kills. Having a Salve-Maker on hand to mix Beast Liver and Dragon Fang and double allies' maximum HP is a must, and be sure not to overdo the Braves so you have time to recover and stay on top of the massive damage Yulyana inflicts.

Conjurer is something of a jack-of-all-trades class, though once you've mastered all the Jobs you'll probably want to switch back to Freelancer. Noteworthy abilities include Invocation, which lets you use Summon magic to buff your abilities, and Obliterate, which instakills anything twenty or more levels below you -- great for grinding.

Conjurer Abilities

  • Job Level 1: Invocation Lv.1 (job command) -- Enables use of level 1 Invocation.
  • Job Level 2: Steady MP Recover (support ability, cost 1) -- Recover 30MP at the end of each turn.
  • Job Level 3: Invocation Lv.2 (job command) -- Enables use of level 2 Invocation.
  • Job Level 4: Critical MP Recover (support ability, cost 1) -- Recover 200MP when HP drops below 20%.
  • Job Level 5: Invocation Lv.3 (job command) -- Enables use of level 3 Invocation.
  • Job Level 6: Save SM MP (support ability, cost 2) -- Makes Summon Magic 25% cheaper to cast.
  • Job Level 7: Post-Battle MP (support ability, cost 2) -- Recover 25% of your maximum MP after a battle. Same as Conjurer's passive ability.
  • Job Level 8: Invocation Lv.4 (job command) -- Enables use of level 4 Invocation.
  • Job Level 9: Obliterate (support ability, cost 4) -- Instakill any enemies 20 or levels below you at the start of a battle.
  • Job Level 10: Invocation Lv.5 (job command) -- Enables use of level 5 Invocation.
  • Job Level 11: Max Summoning (support ability, cost 3) -- Summon Magic MP costs double, but damage is 1.5 time normal. Stacks with Summoning Amp.
  • Job Level 12: MP 30% Up (support ability, cost 3) -- Raise maximum MP by 30%.
  • Job Level 13: Invocation Lv.6 (job command) -- Enables use of level 6 Invocation.
  • Job Level 14: Experience Up (support ability, cost 1) -- Earn 1.5 times experience after battle.
 

Saya Kisaragi

The Void Queen
Donor
Credits
0
Vampire
Vampire is Bravely Default's Blue Mage or Enemy Skill materia equivalent -- a class that can learn enemies' abilities after being hit by them once.

After defeating Braev, head to the Vampire Castle in the north-west area of Eternia. Defeat the Dragon Zombie if you have not already done so, then attempt to enter the castle. It transpires you'll need six Keystones to get in, each of which is guarded by a dragon you'll have to defeat. Be wary of the dragons' breath attacks, which can inflict status effects, and their Eye abilities, which can make you weak to each dragon's element.

The Fire stone is east of Starkfort. The Water stone is on a small island north of Yulyana Forest. The Wind stone is near Ancheim Oasis. The Eart stone is in the southwest region of Eternia. The Light stone is north-east of Yulyana Forest. And finally, the Dark stone is near the Imperial villa. When you've acquired all the stones, return to the Vampire Castle and proceed through the dungeon until you reach the boss. Be sure to bring plenty of recovery items -- it's a long, challenging dungeon with some hard-hitting enemies.

The battle against DeRosso is much easier if you have a Templar in your party. Make liberal use of Rampart to protect against Energy Burst and try to keep the party's MP high to protect against Bone Crush, which deals more damage to characters with low HP.

Vampire Abilities

  • Job Level 1: Genome Ability (job command) -- Use a monster's ability.
  • Job Level 2: Absorb P.Damage (support ability, cost 1) -- Restore HP equal to 30% of incoming physical damage, unless that damage KO's you.
  • Job Level 3: Blood Thirst (battle ability) -- Drain HP from an enemy equal to your normal attack power.
  • Job Level 4: Bloodlust (support ability, cost 1) -- Increase Physical Attack, Physical Defense, Magic Attack and Magic Defense by 25% for five turns each time you defeat an enemy.
  • Job Level 5: Charm (battle ability) -- 75% chance to Charm an enemy.
  • Job Level 6: Magic Thirst (battle ability) -- Drain MP from an enemy equal to 10% of your normal attack power.
  • Job Level 7: Monster Ability Up (support ability, cost 1) -- Raise damage from Genome Abilities to 1.25 times normal.
  • Job Level 8: Battle Thirst (battle ability, 16MP) -- Absorb 1BP from a target.
  • Job Level 9: Subvert (battle ability, 20MP) -- 50% chance to Charm all enemies.
  • Job Level 10: Self-Restore (support ability, cost 1) -- Fully restore HP at end of battle.
  • Job Level 11: Absorb Stats (battle ability, 20MP) -- Absorb selected stat from one target.
  • Job Level 12: Drain Attack Up (support ability, cost 1) -- Increase damage from Drain abilities by 1.5 times.
  • Job Level 13: Genome Drain (support ability, cost 1) -- Learn enemy skills when hit by them. Same as Vampire's passive ability.
  • Job Level 14: Rise from Dead (support ability, cost 1) -- 50% chance to automatically recover from KO at the end of a turn.
 

NotThatGuy

Pokémon Champion
Credits
20
Its required cause there are bosses in this game that can destroy your team with ease if you dont know what they are packing. plus its good to understand what the jobs do too.
Still that's a lot of writing xD.
 

Saya Kisaragi

The Void Queen
Donor
Credits
0
It's fairly easy to tell when you are going to fight an Asterisk Boss first you will see a special field deployed that looks like this
hqdefault.jpg

Escape is impossible but victory isn't. Secondly, a special theme is played during an Asterisk Boss (He of the Name or That Person's Name Is, same song but different names).
Plus the person baring the job asterisk will have their title before their real name. Example: Valkyrie Einheria Venus or Vampire Lord Lester DeRosso. Each Asterisk Boss is different in his/hers power timing is everything against them.
 

Saya Kisaragi

The Void Queen
Donor
Credits
0
(SPOILER) Once you reach a certain chapter in Bravely Default, the screen title will change from this
Bravely_Default_Title_Screen.png

to this
1388619089029.jpg

reason will be explained in the game itself. But one thing for sure never trust fairies.
 

Saya Kisaragi

The Void Queen
Donor
Credits
0
51946719.png

As I said before the first Bravely Default game was Bravely Default: Praying Brage. It focuses on Edea Lee's descendant, Edea Lee Oblige (the vestal of wind).
Set two hundred years after the catastrophe that occurred in Bravely Default, the ocean to the south of Luxendarc was evaporated by the Holy Pillar caused by "the one who brings about apocalypse" (終焉を招く者,Shūen wo maneku mono?). The four Crystals, as well as their temples, were shattered and scattered throughout the Luxendarc in the form of thick thunder clouds which blocked out the sun leading to the "decade of blackening rains and roaring thunder" (黒雨と轟雷の十年, Kuroame to gōrai no Jūnen?). Those who survived abandoned the flatlands.

In the present, the world continues to decay. The lands continue separating from the surface slowly rising into the skies and disintegrating in the upper atmosphere. First it had been the cliffs to the west of Florem (フロウエル, Furoueru?), then the northern part of Eisenberg (エイゼンベルグ, Eiszenberugu?). Overthe next hundred years four plains, eight highlands, three oceans and two continents floated into the skies and disintegrated.

Fifty years prior to the game, an organization proclaiming to be of the Crystal Orthodoxy (クリスタル教,Kurisutarukyo?), landed on the rising continent. They gathered the crystal fragments and buried a crystal piece(クリスタル塊, Kurisutarukai?) they had crystallized with the power of prayer within the continent. The continent ceased to rise, coming to a halt above the thunderclouds covering the lands. This place became known as Crystalica (クリスタリカ, Kurisutarika?). The organization traveled by airship to the high lands where people had gathered and brought them to Crystalica, saving them from Luxendarc's end.

Crystalica gave birth to a society revolving around the Crystal Faith. A method for artificially producing crystal, "the law of the crystal" (造晶の法, Zōshō no Hō?) was created and the decline of the crystal power within Crystalica was prevented. The invention of the Anchor Obelisk (アンカーオベリスク, Ankā Oberisuku?) allowed for the efficient collection of crystal fragments from rising continents and the religious organization buried a crystal piece within four other floating continents and appointed four vestals to govern them.

BDPB_Four_Maidens.jpg

(the four vestals, left to right: Curie Oblige, Lilia DeRosso Oblige, Edea Lee Oblige, and Iglia Ningva Oblige)
 

Saya Kisaragi

The Void Queen
Donor
Credits
0
Bravely Default: Flying Fairy Chapter 1 bosses

The Dragon
DRAGON STATS
NameDragon
FamilyDragon
WeaknessWater
Max HP7500
P. Atk140
M. Atk34
P. Def17
M. Def17
If you faced the Dragon in the Demo version of the game, there will be a few similarities. Unfortunately he's a lot tougher, and you have a lot less Jobs. He still has a weakness to water, and fairly low M. Def. Beware of the Dragon's Bully attack that can KO a weaker party member if you aren't careful. The Dragon can also Brave, combining a Bully with a Mow Down attack that can hit everyone at once! Use Special Moves to build combos and lay into him after he Braves.

When the Dragon is downed, he'll leave behind a Thunder Charm, as well as the Rainbow Thread for you to pick up. Take it and return to the Yarnworks.

Orthos, The Bringer of Doom
ORTHOS STATS
NameOrthos
FamilyBeast
WeaknessFire
Max HP5000
P. Atk130
M. Atk34
P. Def14
M. Def17
His stats may seem weaker than the Dragon, but this two headed beast holds two separate HP bars. Their stats are similar, except for the flame engulfed head's weakness to water, and the icy head's weakness to fire. Each head has their own elemental infused attack, as well as being able to team up for a fiery ice fueled Blazzard that hits every party member at once! Guard yourself against these attacks, and focus all of your fire on one of the heads first. Without the second head, Orthos cannot use his Blazzard attack, and will go down that much quicker! You can also steal combat items from both head with a Thief. Orthos will also drop anAntarctic Wind, Bomb Fragment, Potion, and Ether.
 

Saya Kisaragi

The Void Queen
Donor
Credits
0
Bravely Default: Flying Fairy chapter 2 bosses

Land Turtle
LAND TURTLE STATS
NameLand Turtle
FamilyAquatic
WeaknessWater
Max HP15000
P. Atk160
M. Atk50
P. Def60
M. Def12
If you've played the Demo, you'll recognize this boss, and his abilities. However he's pretty tough even with this knowledge. His low magic defense is offset by his ability to cast Reflect, which can knock your magic damage right back at your party! Consider using a Spell Fencer with a blizzard infused blade to deal damage rather than throwing traditional spells. The Land Turtle also likes to Default several turns before unleashing several Spin Attacks than can deal quite a bit of damage to the unprotected. Consider waiting for his reflect to fall or for him to Brave before countering. A skilled Thief can also swipe an Iron Pole from him.

Rusalka, The Purveyor of Doom plus false Rusalkas
RUSALKA STATS
NameRusalka
FamilyAquatic
WeaknessLightning
Max HP30000
P. Atk155
M. Atk62
P. Def31
M. Def31
Rusalka's not an extremely powerful boss, although she does have a way of prolonging the fight. She will often create a clone of herself, and the only way to find the real Rusalka is to destroy the weaker clones! If that wasn't bad enough, she will disappear into the ground using Seep before emerging with a party wide damaging attack, creating several clones in the process!

FAKE RUSALKA STATS
NameRusalka
FamilyAquatic
WeaknessLightning
Max HP2000
P. Atk142
M. Atk58
P. Def0
M. Def29
As you can see, the clones have little HP, and virtually no defense. This is where having an all target attack like Crescent Moon from the Valkyrie Job or using a Black Mage or Red Mage Thundara to weed out the clones. Also don't neglect any all target Special Moves you may have like Air Splitter, combined with a Spell Fencer's sword magic.

There is a trick to finding the real Rusalka amid the fakes. Simply have aFreelancer cast Examine on the real one before the clones emerge, and you'll be able to see her health and target her compared to the clones. Still, its better not to neglect the fakes as they can still do damage, and cast Charm on your party members. If your party has a Thief, you can also steal an Antarctic Wind from the real Rusalka. Another way to find the real Rusalka is to watch right after she has attacked your party with Seap (the power that spawns the clones) as she she comes back up one of the 4 will have a -1 BP and that is the real Rusalka
 

Saya Kisaragi

The Void Queen
Donor
Credits
0
Bravely Default: Flying Fairy chapter 3 Bosses

Automatons x3
AUTOMATON STATS
NameAutomaton
FamilyInorganic
WeaknessLightning
Max HP10000
P. Atk200
M. Atk64
P. Def48
M. Def32


It's best to treat these three as regular monsters, albeit with higher HP. Even with high HP for a regular enemy, they pale in comparison to other bosses, so consider using jobs like the Valkyrie or Summoner, and usingAbilities that target multiple enemies like Crescent Moon. A Spell Fencerwith a lightning enchanted blade using Air Splitter or Crescent Moon can deal some serious damage to these enemies. Still, the Automatons are not to be trifled with, as three consecutive Rocket Punches can deal a lot of damage to the entire party if your guard isn't up. If you have a Thief, you can try stealing a Pantheon's Wrath from the Automatons.

Chaugmar, the Mark of Doom
CHAUGMAR STATS
NameChaugmar
FamilyDemon
WeaknessLightning
Max HP40000
P. Atk280
M. Atk241
P. Def(9999) 41
M. Def(9999) 41
  • (When shielded by his barrier)
As you can see from the stats above, as long as Chaugmar remains shielded, he will remain all but invulnerable to attack. Instead this is the time to build up BP, use buffs, and prepare for him to drop his shield. When he does will be the time to strike. However Chaugmar will only drop his shield to unleash his ultimate ability, and it's no small attack! If you aren't defaulting with your characters the turn after he transforms, there is a high chance they won't survive his Energy Burst. As tempting as it is to unleash everything you have the moment he drops his guard, your party may wipe if you can't defeat him in that turn. You can also use the Jumpattack from the Valkyrie job to take to the air when he drops his barrier and drop down to attack after his attack passes.

When Chaugmar transforms back into his impenetrable barrier, he won't wait around either. He can still drain life from your characters, and will even suck the BP from your party to add to his own pool, which can lead to him draining life from a party member twice in a row, with deadly results! Keep your party healed, and attack him with Special Moves or the Valkyrie and Pirate abilities that deal lots of damage quickly, like Double Damage. If you rely on attacks that take time, you'll find Chaugmar will quickly transform, making long term Special Move chaining ineffective. If you have a talented Thief, you can chance to steal a Bomb Arm when his barrier drops.

Behemoth
BEHEMOTH STATS
NameBehemoth
FamilyAquatic
WeaknessLightning
Max HP80000
P. Atk299
M. Atk92
P. Def46
M. Def46
The Behemoth can be a nasty foe with his unpredictable attacks that range from silencing, poisoning, and high damage bites and roars. He also has the ability to guard against attacks, which can even nullify yourSpecial Moves! Capitalize on his weakness to electricity either with aSpellfencer mixed with a high damage dealing job, or make use of the lightning damage katana found earlier in the Engine Room. The Ninja job can also be of use here, coupling the Utsusemi dodge ability with Ninjaand Red Mage abilities that capitalize on evasions. Just be sure to keep your group healed up and ready to remedy those affected by poison or silence.
 

Saya Kisaragi

The Void Queen
Donor
Credits
0
Bravely Default: Flying Fairy chapter 4 bosses

Ice Golem
ICE GOLEM STATS
NameIce Golem
FamilyInorganic
WeaknessFire
Max HP60000
P. Atk265
M. Atk96
P. Def53
M. Def53

This guy packs a punch, to say nothing of his ice based attacks. If you've got your hands on any Ice Charms, consider equipping them to lower the damage done to your party. The Ice Golem will alternate between Freezing Punches that can Stop your characters in place, and a party wide Blizzard Blast. With his high HP, you'll just have to outlast him by building up BP and unleashing your powerful moves whenever possible. If you have a Thief handy, you can try stealing a Permacrystal.

Optional Bosses: Guardian and Zombie Dragon

As you can see from the World Map, there are three paths that lead to Central Command. The North path is the shortest, but boasts a very tough boss standing in the way. The path to the West is slightly longer, but has enemies less tougher than the North pass. The way East is the longest path by far, but has far weaker enemies guarding it.

If you choose the North path, prepare yourself for a long fight with the Guardian.

GUARDIAN STATS
NameGuardian
FamilyInorganic
WeaknessLightning
Max HP90000
P. Atk282
M. Atk95
P. Def48
M. Def47
The Guardian, like the Automaton from Chapter 3, is full of HP and deals a fair amount of damage with its Rocket Punch. If you aren't careful, this boss can easily one hit KO a party member in a single strike. The Guardian will also boost its evasion, and attack, at the cost of defense. You'll also need to heal constantly, as an Eternian Bombardment will deal1500 damage to everyone every 3 turns. The name of the game is outlast, so keep yours party healed and unleash Special Moves when you have an opening. A Thief can also steal a Permacrystal from the boss, and the Guardian will drop an X-Potion upon defeat.

If you choose the Western route, be prepared to face a Dragon Zombie as you pass the Vampire Castle (Which cannot be opened just yet).


DRAGON ZOMBIE STATS
NameDragon Zombie
FamilyUndead Dragonkind
WeaknessFire, Light
Max HP25000(x2)
P. Atk282
M. Atk112
P. Def65
M. Def47
The Dragon Zombie looks more imposing than it is, although its HP is a bit misleading. Upon defeat, the Dragon Zombie will revive itself to full HP, effectively doubling its HP. It also boasts nasty breath attacks like the ability to poison your party, and its Bite attack can do some serious damage. It does have a very large weak spot though, as being undead makes the Dragon extremely vulnerable to healing magic, especially Raise. Otherwise, use Special Moves thoughtfully, and anticipate it's resurrection. Having a Star Pendant or two can't hurt either, making his Poison Breath less effective. A good Thief can also steal a Permacrystaland Dragon Fang.

Gigas Lich, The Propagator of Doom

Health: 80,000 (Normal mode)/ 108,000 (Hard Mode)
Stolen items: Giant's axe, Giant's glove
Item drop: Giant's Axe
Weakness: Light

Gigas Lich will often buff himself with his Negative Energy ability. This will increase his attack power. If you have a dispel ability on your support class, its highly recommended to dispel him each time when he buff himself. As the battle drags on longer, the Lich will start casting fear and death on your party members.
 
Last edited:

Saya Kisaragi

The Void Queen
Donor
Credits
0
Bravely Default, if you dont already know from the previous posts, follows a chapter system. the game begins with the prologue which gives you 4 job titles and completes the party formation as well as gaining an airship. After the prologue, Chapters 1 through 4 go through the process of reviving the crystals of the four elements plus subquests to gain more job titles. Chapter 1's goal is to revive the Wind Crystal plus to also gain the Thief, Merchant, Spell Fencer, and Time Mage jobs. Chapter 2's goal is to awaken the Water Crystal plus gain the Ranger, Summoner, Valkyrie, and Red Mage jobs. Chapter 3's goal is to awaken the Fire Crystal plus gain the Salve-Maker, Performer, Pirate, Ninja, and Swordmaster jobs. Chapter 4's goal is awakening the Earth Crystal and head to the Holy Pillar after all the crystals are awakened, however you gain the Arcanist, Spiritmaster, Templar, and Dark Knight titles plus the subsquest for the Vampire job. Chapter 5 is tricky, you have to awaken the crystals again plus fight the asterisk bosses again for EXP and JP (optional). Chapter 6 is the same but you can gain the summon, Susano'o and the Conjurer job. Chapters 7-8 are the same as 5-6 but the asterisk bosses team up in groups of three to four. The final chapter has two ways to unlock, option a: when awakening the crystal keep pressing the X button ignoring Airy's warning thus destroying the crystal and go straight to the final chapter (false) or option b: follow chapters 1-8 and unlock it normally to gain the true ending. either way you do it, you still fight Airy but if you get the True Final Chapter you dont fight just Airy but the Master of all evil, Ouroboros. (Plus you can gain the option boss by getting the true final chapter.)
 

Saya Kisaragi

The Void Queen
Donor
Credits
0
Chapters 5-8 bosses
Once you go through the Holy Pillar and defeat Dark Knight Alternis Dim at the end of chapter 4, you awaken in the Caldisla Inn as Tiz and your party is gone. Head to the Norende Ravine and find Agnes, then head back to Caldisla and find Ringabel then Edea. Head into the Inn and Grandship will be yours again. The Party comes to a conclusion that they have entered another world. (you can tell this every time by looking at Airy's wings for a number pattern) Now you have to awaken the four crystals again but now the bosses of the crystals have higher HP but are easier since you fought them before.

Orthros
  • HP: 67,500 (Each Head – Max)
  • Weakness: Fire (Ice Head) Water (Fire Head)
  • Rewards: Artic Wind, Bomb Arm
Rusalka
  • HP: 81,000 (Max)
  • Weakness: Lightning
  • Rewards: Turbo Ether
Chaugmar
  • HP: 94, 500 (Max)
  • Weakness: Lightning
  • Rewards: Reflect Ring
Gigas Lich
  • HP: 135,000 (Max)
  • Weakness: Light
  • Rewards: Giant Axe
you will repeat this until the end of Chpater 8 however you only fight Alternis again once but only for chapter 5's end. he returns in chapter 6 for a requirement in the Conjurer subquest.
 

Saya Kisaragi

The Void Queen
Donor
Credits
0
Final Chapter (false)
to unlock the false final chapter, just simple destroy a crystal in chapters 5-8. This will not give you the true ending but will unlock Agnes' Vestal Garb. To destroy a crystal, simply ignore Airy's demand to stop pressing the X button at a certain point thus the crystal overloads cause of the prayers Agnes is placing into them. Leave the temple of the destroy crystal and head to the Norende Chasm and enter the Aurora of Darkness. A pretty long dungeon, the dungeons have warp points that leads to a higher floor, the dungeon is pretty and by the time you reach to the end, you will be at the 7th floor.

Boss: Airy

Health: 150,000 (normal mode)/ 202,500 (hard mode)
Stolen Item: N/A
Item Drop: N/A
Weakness: Fire
Airy's first form is not that deadly, but she does have the ability to cast stop on your whole party, which can be a huge nuisance. If you have a time mage, there's a support ability that lets you null her Stop attack. A method of ending this fight very quick, is if you have a very strong Ninja and skills from a high level Spell Fencer, and imbue your weapon with Firaga, and melee Airy to death. Airy's hardest hitting attack is a skill called Slaughter, if you have any skill that can null physical attack, use it. Because your HP will be reduced to extremely low after being hit by it.

Boss: Airy (Second Form)

Health: 99,999 x2 (Normal mode)/ 134,998 x2 (Hard mode)
Stolen Item: N/A
Item Drop: N/A
Weakness: Fire
Airy's Second form relies on very strong magic attacks, but before she cast them, she will use Acedia which will make them weak to all elements. When she does that, I suggest having someone with white magic and cast dispel to null the effects. Other methods include using the Spiritmaster's stillness which null all damage taken for a few turns, this also Includes Airy. She can also use a skill called irritation that cause your allies to go berserk. Airy's actual HP can be confusing, each time when she recovers, although the screen will say 9999 HP, she actually has fully recover her HP. Once you have successfully taken down her health, a conversation event will happen, and this will bring her HP back to full again, so you will need to defeat her twice if she doesn't recover.

Airy_first_form.jpg
(Airy's First Form)
Airy_second_form_insult.jpg
(Airy's Second Form)
(Airy's Battle theme for both her forms)
 

testing

Top