Bravely Default: Where the Fairy Flies

Saya Kisaragi

The Void Queen
Donor
Credits
0
Final Chapter (True)

To unlock this simply awaken all the crystals through chapters 5-8. Once you head to the Holy Pillar, an event on Grandship will activate and reveal a shocking discovery, Airy has betrayed the Crystal Orthodoxy and Agnes. She tells the party that she is a servant of Ouroboros and thanks them that awakening the crystals of all the world will bring her master to this realm and asks him to grant her power to destroy the party.
the fight is completely the same as in the false final chapter so view over it.

after you defeat Airy head to the Great Chasm and enter the Dark Aurora. A pretty long dungeon, the dungeons have warp points that leads to a higher floor, the dungeon is pretty simple and by the time you reach to the end, you will be at the 7th floor. If you have already beaten the Final Chapter, then this area is exact same as it was in the final chapter. Get all the way to the end and fight the final boss.
Airy will be waiting for you and she is stronger than before now that she is in her perfect form.

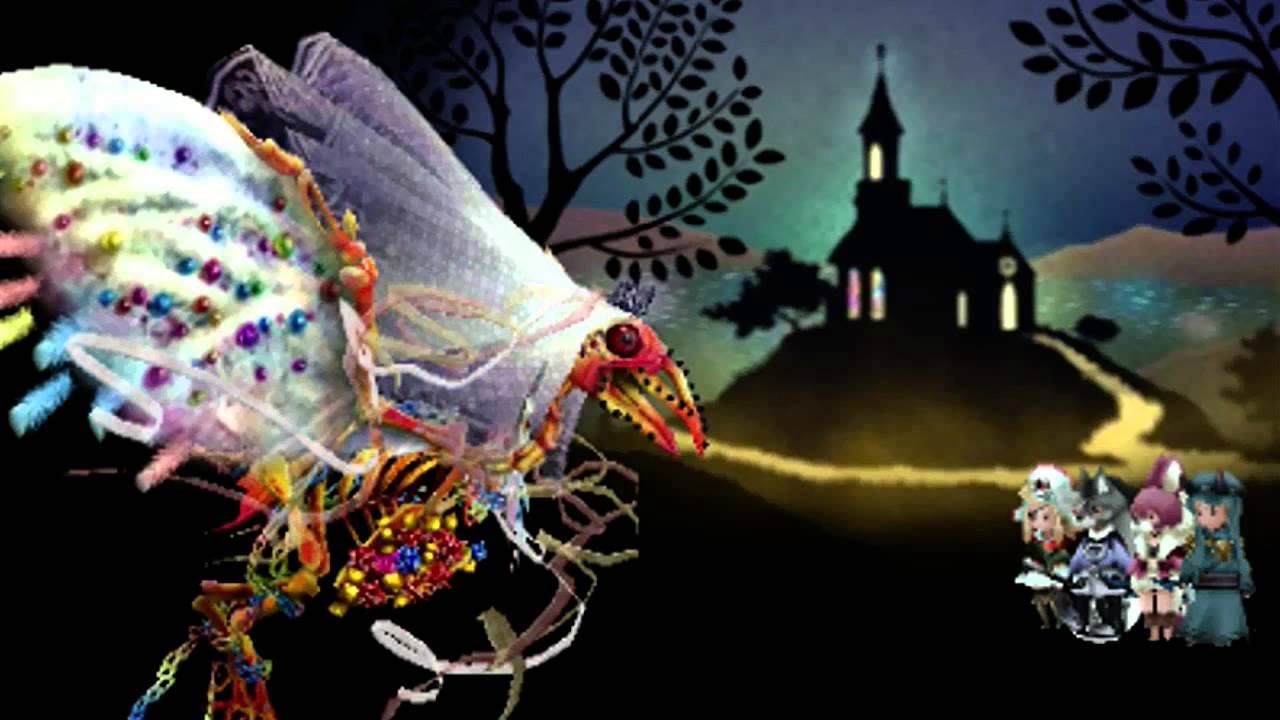
Boss: Airy (Perfect Form)

Health: 99,999 x3 (normal)/ 134,998 x3 (hard)
Stolen Item: N/A
Item Drop: N/A
Weakness: Fire
Airy's Perfect is very similar to her second form on the airship battle. Except with way higher status, which makes this battle really difficult. A pattern of her is to go default and use Acedia and Zeta Flare in one turn, which can deal 4000 to 7000 damage to your entire party, this can mean an instant game over. Another attack that you need to watch out for, is her Slaughter ability, which hits randomly, and deals around 5000 damage on all targets or 9999 damage to the remaining allies standing. Making this battle really hard. There is many tactics that you can use to avoid Airy's attacks. If you have a Salve-Maker in your party, you can compound Giant's Draft(BeastLiver + Dragon Fang) to have HP beyond 9999 to survive Airy's insane damage output. Another method would be relying on Spiritmaster's ward ability. Valkyries High Jump Method. The High Jump method lets you cheese through any singular boss fights. All you have to do is equip someone in the party with Hasten World (Time Mage Level 14), and then set everyone to do High Jump on the very first turn, and press Y to set the game on auto. If your speed is quick enough, you should able to defeat Airy without getting a single scratch If the High Jump method doesn't work, try equipping agility boosting items until it works. (Falcon Knife, Fox Tail or Hermes Shoes.)
Airy_final_form.jpg
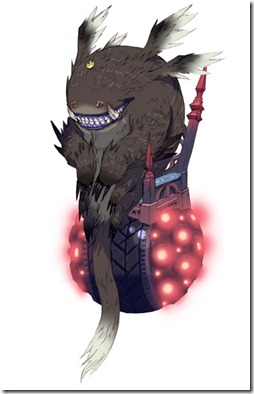
(Airy's Perfect Form)
(Airy Perfect Form battle theme)
Once you have defeated Airy, you can go back to the save point to prepare for the next battle. To make things alot easier, I suggest your party members to equip accessories that can Nullfy Death.

Boss: Ouroboros (1st Phase)

Health: 150,000 (normal)/ 202,500 (hard)
Weakness: Water
The very first form of Ouroboros take the shape of your party members and have abilities found in various job class. This form is pretty much a push over compare to the last boss fight. Ouroboro isn't all that offensive and doesn't push your party over the edge.

Boss: Ouroboros (2nd Phase)

Health: 100,000 (normal)/135,000 (hard)
Weakness: Water

This phase is really short. Ouroboros have some instant kills attacks. But regardless of how much damage you do, he will heal himself completely. You need to do a certain amount of damage to Ouroboros and then an event scene will trigger and the battle will end.

Boss: Ouroboros (3rd Phase)

Health: 150,000 (normal)/202,500 (hard)
Weakness: Water

This phase is almost exactly the same as the last one. Ouroboros still relies on instant kill attacks but has two new skills, although he rarely use it in this phase, the skill is Demonic Touch which is used to minus your BP by 1. The other skill is Celestial Touch, which is to buff his his attack power. Once you have deal about half of his HP, a cutscene will trigger.

Boss: Ouroboros (4th Phase)

Health: 200,000 (normal)/ 275,000 (hard)
Weakness: Water

Similar to the last phase, except he will now use his Demonic Touch and Celestial Touch more frequent. After a certain amount of turns passed, he will use Armageddon, which will deal massive damage and restore his HP to full. You need to survive Armageddon three times for this phase to end. If you have trouble surviving Armageddon, try using Salve-Maker's compound ability and create Giant's Draft (Beast Liver + Dragon Fang) to have HP surpassing 9999.

Boss: Ouroboros (5th Phase)

Health: 200,000 (normal)/ 275,000 (hard)
Weakness: Water

Same as the last phase, except now he has a new ability called Diaster which deals massive damage to the whole party, around 4000 to 6000. For last phase Ouroboros can do Divergence which will prevent your party member from taking any action except Default or summon friends. This can real annoying if he used Divergence to your healers.

Once you beat Ouroboros, the true ending will occur and the game is over.

Infernalrealm.jpg
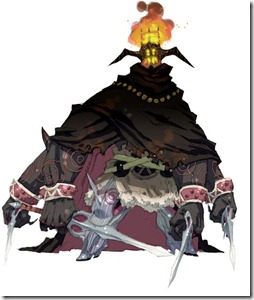
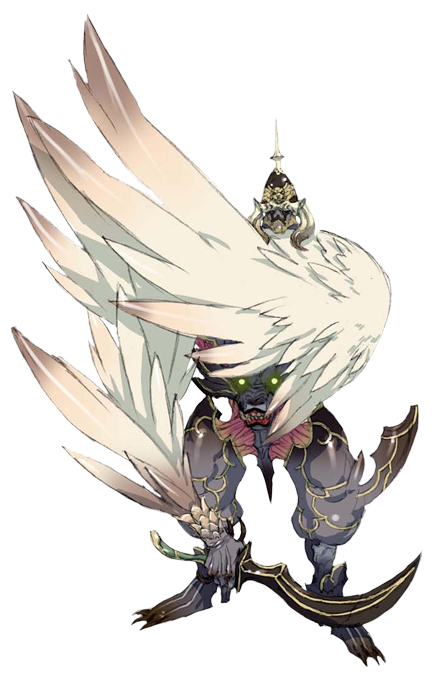
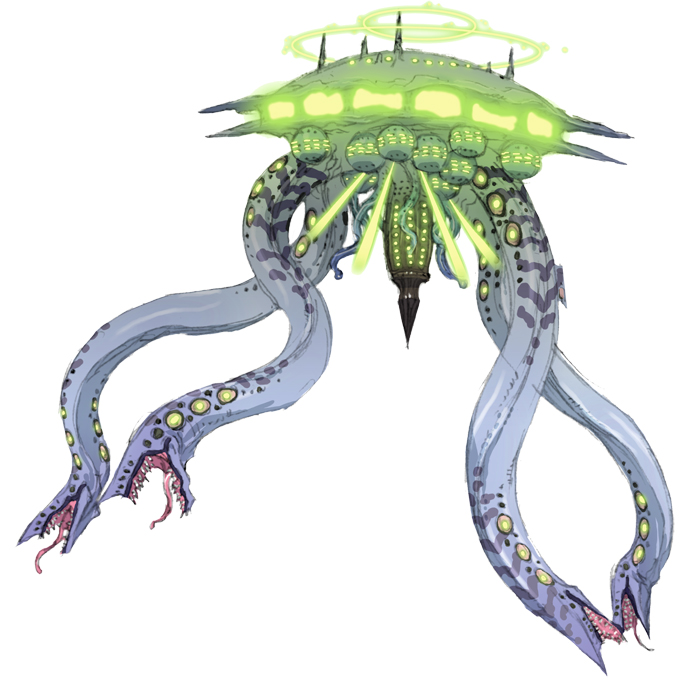
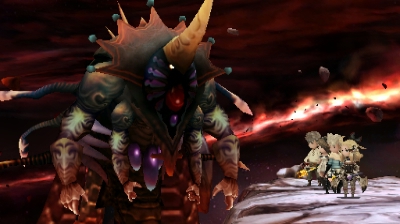
(the final boss, Ouroboros)
(the final boss theme, the battle theme for Ouroboros)
 

Saya Kisaragi

The Void Queen
Donor
Credits
0
Bravely Default's most strongest boss (Optional)

every JRPG has an incredibly strong boss (Tales of the Abyss had Nebilim and Dissidia 012 Final Fantasy had Feral Chaos are prime examples). most players of BDFF don't know but its not an exclusion of that fact, it has a powerful boss. What you do is talk to Lord DeRosso and a secret dungeon appears near where you can obtain the summon, Susano'o. Enter Dimension's Harp and you will find the most strongest items in the game in the dungeon's chests plus the boss. (which you can find him in a secret passage) At this point, you are probably wondering who is this powerful boss? The funny part about this boss is that you see him in every dungeon and town in this game. The ultimate boss is the Adventurer.
maxresdefault.jpg


Boss: Adventurer and Fox companion

Health (Adventurer): 530,000 (normal)/ 715,500 (hard)
Health (Comrade): 50,000 (normal)/ 67,500 (hard)
Stolen Items (Adventurer): Tengu's Breath, X-Potion
Stolen Items (Comrade): Antidote
Item Drop (Adventurer): Adventurer's Mark
Item Drop (Comrade): N/A
(no Weaknesses)
The ultimate boss in Bravely Default, the Adventurer hits extremely hard, his "All Slash" attack can hit an entire party of 6000 to 7000 HP, which can instantly wipe out an underlevel party, and not only that but his loyal fox companion is real annoying. The fox can take damage for the Adventurer and the two bosses has the ability to revive each other. If you're using single attack skills, you can't hit the adventurer until you have defeated the fox first. The adventurer will revive the fox immediately. If you defeat ever defeated the adventurer without killing the fox, the fox will bring back the adventurer back to life, leaving all your efforts down in the drain. If you want to cheese through this boss battle, then you should ask or add friend that create an attack using Bravely Second that does more then do more then 530000 to 720000 within one turn and then use Merchant class Full leverage and then summon all your friends at once 500000 damage does around 170000 damage in full leverage. So you will need about 4 to 5 friends in this damage range to achieve this. If you plan on fighting this boss legit, then I suggest you maxed out Templar Job class and Spiritmaster. Your physical attackers are most likely going to be Pirates for this fight. Holy Arts will be useful because of the Rampart skill, Spiritmaster has stillness which is great for protecting the later half of the battle when he start spamming meteor. If you plan on beating the Adventurer on hard mode, I would suggest you to use the Merchant ability Low Leverage, it will reduce everyone's damage output by half. This will make this a very long battle, but it's a safe way of defeating him.

Easy mode only
For players that have played the original Bravely Default back in 2012, there is Pirate and Ninja combo that can defeat the Adventurer. However because this combo was nerfed, it only works on easy mode and with a little bit of luck. What you need to do for that combo is to master Ranger's job level for your three physical attackers, you will also need around Templar at job level 11 for BP limit Up. Once you do, equip your physical attacker with double Excalibur and equip lustrous robe, and then with following support ability, Precision, Hawkeye, BP Limit up. Then for your support unit you need a maxed out Performer job level and also have maxed out Time mage. You will also need to have Spiritmaster as secondary job command. The support unit should equip Hasten World as his/her job ability and also must be with accessories that boost his/her speed because it needs to go first. Now fight the Adventurer and die. Once you have been wiped. Revive your characters, but do not heal them. Then fight the Adventurer again. Your support unit needs to go first. On the first turn, have your support unit use Brave once, and then cast Convert BP and then Stillness. The rest of the attackers use Default. Then on the next turn, the support unit should use Love Rush to boost the party member speed. The rest of the attack unit should default. Now on the third turn, use your support unit use Love Power twice. The attack unit that should all use Brave four times and all select Mass Attack from the pirate job command. This will cause all your party member that is low on HP to attack the Adventurer all at once. Once the command is over, you will need a bit of luck so the adventurer doesn't kill all your party members at once, and then repeat the same thing again.

Jump Method
The Jump Method works on defeating the Adventurer on hard mode. However it takes about 30 to 40 mins on max fast forward speed in auto mode. To perform this setup you need to setup 4 Valkryies and one of them with the Hasten World ability. Then also equip with Speed Up 30% and Speed up 10% from Thief class. You need also wear Hermes Shoes to boost another 20 agility. As long you faster then the Adventurer then this method will work. Begin the battle and have all Valkryies use high jump, the one that has Hasten World equip might be too slow without the speed abilities and will be K.O. do not bother resurrecting the K.O. Ally member, just keep the game on auto by pressing Y once and just wait about 30 to 40 mins and the Adventurer should be defeated if everything goes according to plan.
 

Saya Kisaragi

The Void Queen
Donor
Credits
0
Bravely Default: special moves themes

most JRPGs never have a special theme for unleashing your Special Move, Bravely Default has broken that barrier and has given Tiz Arrior, Agnes Oblige, Ringabel, and Edea Lee their very own special move themes
Tiz's Theme: You're My Hope
Agnes' Theme: Wind's Course
Ringabel's Theme: The Vagrant of Love
Edea's Theme: Baby Bird


A special move can only be unleashed if the weapon each party member holds is achieved.
Weapon Types/ special moves name (three each):
Sword: Hack and Slash, Air Slpitter, Sonic Wave
Axe: Grand Strike, Maelstrom, Gigaton Swing
Spear: Horizon, Overpower, Megiddo Flame
Rod: Piercing Blot, Withering Ripple, Holy Weapon
Staff: Rejuvenation, Lux, Divine Light
Dagger: Infinity, Blade Storm, Cross Divide
Bow: Maximum Draw, Rapid Fire, Angelic Pillar
Katana: Moonshadow, Breaking Wave, Petal Swirl
Knuckle: Moonbeam, Ascendant Palm, Thunderburst

Requirements to unleash each Special Move for each weapon

Swords
Hack and Slash: Brave 10 times
Air Splitter: Brave 20 times
Sonic Wave: Brave 30 times

Axes
Grand Strike: Defeat 5 enemies with physical attacks
Maelstrom: Defeat 10 enemies with physical attacks
Gigaton Swing: Defeat 15 enemies with physical attacks

Spears
Horizon: Damage 10 different enemies with physical attacks
Overpower: Damage 20 different enemies with physical attacks
Megiddo Flame: Damage 30 different enemies with physical attacks

Rods
Piercing Bolt: Use magic 10 times (healing magic must restore Hp to count)
Withering Ripple: Use magic 20 times (healing magic must restore Hp to count)
Holy Weapon: Use magic 30 times (healing magic must restore Hp to count)

Staves
Rejuvenation: Heal 10 times (Magic or item: does not need to restore HP to count)
Lux: Heal 20 times (Magic or item: does not need to restore HP to count)
Divine Light: Heal 30 times (Magic or item: does not need to restore HP to count)

Daggers
Inifinty: Use items 5 times (Using Equipment does not count)
Blade Storm: Use items 10 times (Using Equipment does not count)
Cross Divide: Use items 15 times (Using Equipment does not count)

Bows
Maximum Draw: Exploit Enemy Weakness 5 times with physical attacks
Rapid Fire: Exploit Enemy Weakness 10 times with physical attacks
Angelic Pillar: Exploit enemy weakness 15 times with physical attacks

Katanas
Moonshadow: Default 5 times
Breaking Wave: Default 10 times
Petal Swirl: Default 15 times

Knuckles
Moonbeam: Deal critical damge 3 times
Ascendant Palm: Deal critical damage 6 times
Thunderburst: Deal critical damage 9 times
 

Saya Kisaragi

The Void Queen
Donor
Credits
0
Just for the hell of it I'm going to post the vocal versions of You're My Hope, Wind's Course, The Vagrant of Love, and Baby Bird


Saya Kisaragi

The Void Queen
Donor
Credits
0
secret trailer/ special trailer for Bravely Default's sequel, Bravely Second. there are to ways to unlock it, get the true ending or use the Konami Code. which is up, up, down, down, left, right, left, right, B, A. the movie uses the gyro system which means you can look around and zoom in and out. Warning: there are spoilers in this trailer. so enjoy the trailer.
 
Last edited:

Saya Kisaragi

The Void Queen
Donor
Credits
0
Norende Rebuilding

as you are aware that Norende doesn't exist anymore cause of the Great Chasm. But the game, gives you the ability to rebuild Norende. you begin with only a small area to work which you must reclaim. spotpassing will give you more people to lessen the time to upgrade shops and reclaim land. however with spotpassing to gain more people isn't only thing coming into Norende, there are Nemesis' entering the village. I'll post all the info on the Nemeses later on.
norende.jpg
(Nornede looks like this we you begin the rebuild)
the shops level up until Level 11 which unlock incredible weapons, armor, and alter. costumes for Tiz, Agnes, Ringabel and Edea.
(Onion Shirt for Tiz, Knight's Tunic for Agnes, Melodist Shirt for Ringabel and Edea's Garb for Edea)
BDFFtizoninknight.jpg
BDFF_Agn%C3%A8s_Knight.png
BDFF_Ringabel_Composer.png
Edea_Lee_Prayer_Costume.png
 

Saya Kisaragi

The Void Queen
Donor
Credits
0
Beelzebub (Nemesis)

Boss: Beelzebub (suggested lv 10)
Health: 3,000 (normal)/ 5,400 (hard)
Stolen Item: Nothing
Item Drop: Mind Bun, Dexterity Bun
Weakness: Lightning and Earth

Beelzebub is one of the earliest Nemesis you will receive from Square Enix. I highly recommend getting the full party before you start this fight. Beelzbub does have some hard hitting attacks. Once its start to build up it's BP, it will use a skill called Gluttony which will absorb all the damage it takes from you and heal himself. However if you manage to do enough damage, it will cause an overflow which will take all that damage it absorb during Gluttony back to him. When it unleash acid breath on you, not only this skill hurts, but it also reduce your physical defense by 25%. Defeating Beelzebub will drop Mind Bun, these can increase your Mind status permanently.
06-bravely-default-for-the-sequel-edition-2.jpg
 

Saya Kisaragi

The Void Queen
Donor
Credits
0
Mammon

Boss: Mammon (suggested lv 25)
Health: ???? (normal)/ 27,000 (hard)
Stolen Item: Elixirs (Ethers on some versions)
Item Drop: HP Booster Bun
Weakness: Fire

Mammon relies on casting Blizzaja each turn for her main course of damage. If you carry the accessory "Iceflame Shield" I highly suggest equipping it null her Blizzaja. But do keep in mind she does have the ability to dispel that. Another annoying thing about Mammon, is that she can use a skill call Avarice which absorb 1 BP from your entire team giving her 4 BP instantly. Mammon, can also drain your status buff from your whole team, so having a white mage to dispel her buffs would come in pretty handy for this fight. If your Mammon is sent by someone that owns a Japanese copy, you can steal Elixirs from Mammon, this is actually a quick source of easy money. Just steal the Elixir and then run away and repeat. Once you have a high amount of Elixir sell it back to the shops for 25000 pg each.
10-bravely-default-for-the-sequel-edition-3.jpg
 

Saya Kisaragi

The Void Queen
Donor
Credits
0
Asmodeus

Boss: Asmodeus (suggested lv 70)
Health: ???? (normal)/ 405,000
Stolen Item: Nothing
Item Drop: MP Booster Bun
Weakness: Water, Wind

Asmodeus is pretty tough boss. Before you start this fight, I recommend equipping the accessory Thunder Charm, because of it's Thunderja attack. Thunderja can hit the entire party for 3000 to 5000 damage depending on your gear, this can mean instant wipe. If you have the Spiritmaster job class, the skill Adaptation can easily overcome this issue. You can also learn Thunderja if you have the Vampire job class or the Genome Drain skill. Asmodeus likes to charm your party members, which can get real annoying quick, if you have Ribbon, I suggest equipping them to save yourself from the headache. He can also use a skill "Call of the Infernals" which takes one of your allies away and when he release them they will be charmed no matter what. If it is the last ally standing being hit by that skill then it is a game over.
10-bravely-default-for-the-sequel-edition-4.jpg
 

Saya Kisaragi

The Void Queen
Donor
Credits
0
Belphegor

Boss: Belphegor (suggested lv 80)
Health: 250,000 (normal)/ 337,500 (hard)
Stolen Item: Nothing
Item Drop: Mind Bun
Weakness: Random (can be changed)

If you plan on defeating Belphegor, then you must use mages for this battle. Belphegor is immune to all physical attacks and only elemental magic does damage to him. I suggest you to bring a Freelancer on your first encounter with Belphegor and use Examine. This will let you see Belphegor's Weakness by pressing left on the Circle Pad. Then run away and have your most optimize setup against Belphegor. The weakness for Belphegor rotates after you have hit him with the correct weakness. The pattern goes Fire-Ice-Lighting. If you ever forget the pattern, look at the order of your spell listed in your Black Magic (if you are using Black Mage). I suggest you to bring a spiritmaster as a secondary job command, using Spiritmaster can help you nullify some of the magic damage cause by Belphegor. And also make sure your healer have Epic Group Cast, which lets your single target spell to hit all targets. Because Belphegor's Sloth will make you weak to all elements, epic group cast lets you dispel that instantly. After a few turns or so, Belphegor will summon Spheres, these Sphere hit hard physically and can cast one of the three Ja magics. The Sphere is exactly the same as Belphegor they require you to hit them with the right weakeness or else it will heal them.

Instant Kill Method
There is a method you can use to instant kill Belphegor. You need to have an maxed out Monk, Merchant and someone with either Salve-maker or Performer abilities. Equip your monk with skill set Natural Talent (Monk), Critical Amp (Templar) Physical Attack +10% (Monk) and Speculate (Merchant). Then you need to equip the monk with Nothing, this should raise your attack power dramatically. Now go on random battles and land 9 critical hits with your monk so that you can use your Thunderburst skill from Special. Now when fighting Belphegor, Buff up the Monk's attack power by using your Salve-maker or Performer. Then have the merchant use Pay to Play three times on the Monk, and then full leverage. Then turn on Bravely Second and use Thunderburst on Belphegor. This should do 0 damage or somewhere in 300000 to 700000 depending on your status.
002_thumb15.jpg
 

Saya Kisaragi

The Void Queen
Donor
Credits
0
Satan

Boss: Satan (suggested lv 50)
Health: 150,000 (normal)/ 202,500 (hard)
Stolen Item: Nothing
Item Drop: Agility Bun, Vitality Bun
Weakness: Water

Satan is a pretty strange boss, you can do anything except attack him. As you him there is a chance of him gaining BP, the more BP he gains the higher combo he can dish out, if he is BP is built to 3, if will combo his blade move three times in a row leading to an instant game over. To overcome this you need either do less amount of attacks per turn. Satan can also cast wrath this will cause your party members to go berserk, so they will attack him to his BP gauge. You need to remedy your party members quick before they attack him too many times causing his BP to gain, You can also bring a Spiritmaster or someone with Spiritism so that they can use Fairy Ward to overcome this problem.
004_thumb17.jpg
 

Saya Kisaragi

The Void Queen
Donor
Credits
0
Lucifer

Boss: Lucifer (suggested lv 70)
Health: 200,000 (normal)/ 270,000 (hard)
Stolen Item: Nothing
Item Drop: Strength Bun, Agility Bun
Weakness: Wind

Lucifer is the final nemesis you'll be receiving. Before you start this fight you can actually learn Aeroja from Lucifer by having a vampire job class within the party or someone with Genome Drain. Lucifer's pattern of attacks is very straight forward, he hits with a sweep that can deal around 4000 to 6000 damage to the whole party. You'll definitely need someone with White Magic for this battle. Another thing to watch out for is that everytime you attack Lucifer, he will counter you back with two-face which does around 4000 damage, unless you have Rampart or Utsusemi, you cannot attack Lucifer without losing HP. When Lucifer flys up in the air, he wil use Aeroja which does massive wind damage on the party and can be fatal. If you want to cheese through this battle using the High Jump method, then just bring 4 Valkyries with Ninja as a sub class and one party member with Hasten World. Once you start the battle, default on the first turn to build BP and then brave once and use Utsusemi and then High Jump and set the game on auto by pressing Y.
Bravely-Default-For-the-Sequel-Boss-3.jpg
 

Saya Kisaragi

The Void Queen
Donor
Credits
0
When fighting a Nemesis, a special theme plays during the battle. however there are two themes for Nemeses, Normal Nemeses and the Ba'al Nemeses. I'll give the details on the Ba'als but now its for the theme. it will sound something like this
 

Saya Kisaragi

The Void Queen
Donor
Credits
0
It seems I neglected one of the normal Nemeses, Leviathan.

Boss: Leviathan (suggested lv 80)
Health: 300,000 (normal)/ 405,000 (hard)
Stolen Items: Nothing
Item Drop: Strength Bun, Intelligence Bun
Weakness: Lightning

Leviathan has a special passive ability that lets him dodge every melee attack, so the only way to deal damage to him is to use magic. He uses Blizzaja in this form. Also of note is his Envy attack, which reduces all magic and physical attack and defense stats as well as partial Dispel. When he comes down to the ground, his M.Def skyrockets to 9999 and he uses Instant Death and Doom attacks. His The Last Night attack deals massive non elemental damage, too. Either make a Giant's Tonic to push your HP up or buff Reraise (remember Envy might have dispelled it). Because his speed is not too high, you can also get a Stillness + Hasten World strategy in place even without using much AGI enhancing gear. For this strategy, just use Stillness every second turn and have your other characters attack every second turn as well, before Stillness is up. Just remember to protect from Instant Death / Doom using either Safety Rings or the Spiritmasters Fairy Ward. I prefer the second option, even though it requires a second support Unit in an already long battle.
Leviathan_Demon.jpg
 

Saya Kisaragi

The Void Queen
Donor
Credits
0
Now for the Ba'al Nemeses

Boss: Ba'al I;Turtle Dove (suggested lv 99)
Health: 500,000 (normal)/ 675,000 (hard)
Stolen Items: Nothing
Item Drop: Unearthly Bun
Weakness: Wind

Turtle Dove is a very difficult boss to defeat legitimately. Turtle Dove's attacks are guaranteed to hit you for 9999 damage and it does that twice in a turn. The Turtle Dove can also put your character in Love, when a character is in love, it will mimic the action of the character it's in love with. There is nothing that can dispel these status effects, which can be a real pain for this battle. When Turtle Dove reach to a lower HP, it can use love triangle which act similar to confuse. If you want to cheese through this battle, the four Valkyrie combo can destroy Turtle Dove without fail. To set up the Valkyrie combo, you need to have four Valkyries equip them with the fastest gear and equip them with speed increasing abilities. One of the party member needs the ability Hasten World. If you have one free slot in your ability list, you should use the Two-Handed ability to maximize your attack power. Once you start the battle have everyone use High Jump. Then press Y to the game to auto. This method should kill the Turtle Dove on the hardest difficulty level within 3 minutes, as long as you're have around 101 to 110 agility then it should work. (This Valkyrie Method also works on the hidden boss too, but it takes about 30 mins.)
maxresdefault.jpg
 

Saya Kisaragi

The Void Queen
Donor
Credits
0
Ba'al IV;Goldie

Boss: Ba'al IV;Goldie (suggested lv 99)
Health: 500,000 (normal)/ 675,000 (hard)
Stolen Items: Nothing
Item Drop: Unearthly Bun
Weakness: Lightning

Choubi is another one of the new Ba'al Bosses. One of the main things you need to bring for this battle is units with support abilities that can null a physical blow such as Rampart from Templar or Utsusemi from Ninja. The main reason is when it attacks, it will use boncy ball, this can hit your party extremely hard and including itself. The main thing you need to watch out for is when it summons the little fishes, Choubi can eat them to gain a different status property such as HP regen. If you want to cheese through this battle by using the High Jump method, then you need to modify the setup a little bit for it to work. First you need to have Ninja's ability for your character, then when you fight the boss on the very first turn, have the entire party default and then on the next turn, use Brave once, then Utsusemi then High Jump. Once you have your entire team on set to action, leave the game on auto the boss should be dead in 4 to 5 mins.
maxresdefault.jpg
 

Saya Kisaragi

The Void Queen
Donor
Credits
0
As you are well aware Ba'als are the most difficult Nemeses to defeat but to add to the creepy look of the Ba'als, they added the most disturbing music when you fight them.
sounds like something from Howl's Moving Castle mixed with scary music you would hear in haunted houses.
If you want to be an excellent Ba'al Buster like Magnolia Arch then beat every Ba'al Nemesis BDFF has to offer.
 

Saya Kisaragi

The Void Queen
Donor
Credits
0
Most SRPG players know that most Final Fantasy games max damage is 9,999 with or without crits. However Bravely Default Flying Fairy made it possible to bypass the 9999 damage. What you do is activate Bravely Second by using SP (Sleep Points) and then unleash your most powerful special move. If done correctly you can hit the enemy for 999,999 damage with a critical. Here's how you do it.
The Set-up:

Edea (highest P.Atk, by whatever slight amount)

Freelancer with all maxed Jobs
Sword Magic as secondary job

Natural Talent
Critical Amp
Sword Magic Amp
Knuckle Lore

No Equipment (so Natural Talent gets activated)

Thunderburst special
50% Power Boost
Anti whatever you fight
Some element you deal

Buffs:
100% Haste (Quick x2)
100% P.Atk (50% from level 3 Spear special and 50% from common means, choose Singing)
1900% Crit (900% from Level 2 Katana special and 1000% from common meansas Pay to Play)
All elemental amp's (Fairy's Aid)
Element Sword Magic to supplement weaknesses
Full Leverage

for further detail on how to get this just watch this nice video on how this guy pulled a 999,999 crit damage SENT move
 

Saya Kisaragi

The Void Queen
Donor
Credits
0
As most of you are probably unaware but Square Enix has sent special Nemeses: The New Years Nemesis, the Valentine's Day Nemesis, Spring Time Nemesis and the April Fools Nemesis. Each of these nemeses are actually asterisk bosses but however you will not receive the asterisk.

Nemesis: Tako-zumi (New Years Boss) (suggested lv 99)
Health: 1,200,000 (normal)/ 1,620,000 (hard)
Stolen Item: X-Potion
Item Drop: Unearthly Bun

You can NOT run away from the Nemesis as it has an Asterisk Barrier. This guy has 9999 Defense (7499 Easy still) so it is practically impossible to deal damage using Melee attacks. Even if you do, he will just counter for some insane amount of damage. He has a hard hitting, always critting melee attack and uses Susano-o to dish out damage across the board. After loosing half HP, he even starts using Huge BP Drinks, attacking three times in a row. Due to his defense, your best choice is to use Magic. I for one had two Black Mages with Bushido to dish out massive damage, one Spiritmaster with White Magic for Stillness and Healing and a Performer to supply the necessary amount of BP. Even with my Setup focusing on Speed, This Nemesis still got a hit in now or then until I had Haste from the Performer up, then the battle became easy, though long.

Nemesis: Be Mine; White Fox (suggested lv 99)
Health: 160,000 (normal)/ 216,000 (hard)
Steal: Turbo Ether, Elixir
Item Drop: Unearthly Bun

Nemesis: Barras
Health: 250,000 (normal)/ 337,500 (hard)
Steal: Turbo Ether, Elixir
Item Drop: none

This Nemesis is only available on Valentine's Day, but you might get one from Streetpass / Random net Invites anyway. Barras sports 500 P.Def, which makes him negate most physical attacks. One could, in theory, outdo it by pushing your P.Atk over 500 with buffs, but that is not too practical in my opinion. The better way is to go for magic. Be Mine; White Fox (Holly) on the other hand has 9999 M.Def, making her practically immune to magic. You will have to rely on physical attacks to defeat her. Another good option is the Black Mage passive Pierce M.Def, which lets you ignore that 9999 M.Def and deal normal damage with spells.
On the attack side, Barras uses some strong single target attacks. He also uses Invigorate, which ALWAYS fails and deals damage to all. Since this skill targets himself, Jump will not protect from it (High Jump cheese bye bye). Holly just spams Holy, which Enigma or Lustrous Shields will take care of. Since both of their Speed Stats are on the lower side of Nemesis, it is very easy to outspeed them and set up a Stillness Loop.
Also please note that while those two are not immune to Status Ailments as is, their MIND stat is so high that it is almost impossible to land them even with Status Ailment Amp and high INT (unless you have used lots of INT Buns or Unearthly Buns previously).

Nemesis: Cutie Pi; Wooly Bull (suggested lv 99)
Health: 200,000 (normal)/ 270,000 (hard)
Steal: Blood Blade
Item Drop: Unearthly Bun
Weakness: Light

Nemesis: Victor
Health: 200,000 (normal)/ 270,000 (hard)
Steal: Heart Ring
Item Drop: none
Weakness: Dark

Again, because of the high Mind stat it is not recommended to try getting the Poison Status on them, regardless of it being applicable.

Not quite the setup I was expecting for the White Day Nemesis, but fun enough! Those two get through as BP Specialists. Cutie Pi tends to spam Battle Thirst x3 followed by Energy Burst while Victor uses Holy followed by Moderation. You will definitely need some sort of BP Recovery if you want to act your turns against them. Other moves include Graviga + Bone Crush Combo from Cutie Pi and Dispel from Victor.

Though, even if you GET to act, those two are quite formidable. Both sport 9999 P.Def, rendering most physical attacks useless. To make it worse, both also sport over 200 M.Def, reducing magical attacks very harshly. I advice using the Black Mage ability Pierce M.Def, which allows bypassing M.Def and deal normal damage with magic. Meteor works well against those two under this restriction.

Cutie Pi is the faster of the two. Still, at only 90 Speed, it is entirely possible to outspeed him and put up Stillness for protection. Depending on your BP recover strategies, you might end up only having to use it every three or so turns, too.

Another curious note: Those two got the same steals as their Chapter 7 battle. If you want some more Blood Blades and Heart Rings, this is your chance.

Nemesis: Tax on the Cupid (suggested lv 30)
Health: 54,000 (normal)/ 72,900 (hard)
Steal: Jade Crosier
Item Drop: Unearthly Bun

Nemesis: Khint
Health: 54,000 (normal)/ 72,900 (hard)
Steal: Hi-Potion, Mirage Vest
Item Drop: none

There is not much to it as this is a low level fight. Khint even departs as he usually does! Still, their attack pattern differs a bit from the usual.

Khint will use his Status Swords, and not too little. I have seen Sleep and even Death. This is worsened by the main boss spamming Large BP Drinks on him, which allows him to attack four times a turn. Which he does! After he departs, the main boss will rely on TakeOver.

Escape is impossible cause of the Asterisk Barrier these nemeses produce.
 

Saya Kisaragi

The Void Queen
Donor
Credits
0
When you reach Chapter 6 you can unlock some really powerful weapons. The reason behind this is Alternis Dim drops the Chest Key which can unlock the blue chest you see in every dungeon. each of those blue chest contain either a weapon or armor. If you defeated Lord DeRosso in Chapters 4 or 5, he tells you that Sage Yulyana took some weapons from the Crystal Orthodoxy and sealed them away. Then when you get to the final chapter, Yulyana will tell you the remaining weapons he sealed are in the Dimension's Harp.

Chapter 6 weapons and armor:

Longinus
Royal Crown
Muramasa
Hadean Claws
Gale Staff
Air Knife
Yoichi's Bow
Genji Armor
Genji Helm
Genji Gloves
Chaos Blade
Brave Suit
Death Axe
Lustrous Shield
Luminous Robe
Wonder Rod

Dimension's Harp weapons and armor:

Yatagarasu
Demon Staff
Earthbreaker
Artemis' Bow
Kaiser Knuckle
Ame-no-Murakumo
Durandal
Demon Rod
Gungnir
Aegis Shield
Lord Robe

These weapons are the most powerful weapons in game. The reason why Yulyana sealed them will never be known, all we do know is he did to keep them out of the hands of the Orthodoxy.
 

testing

Top